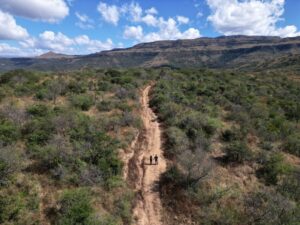
Hiking Kalalau Trail (Nā Pali Coast) was one of the most breathtaking hikes we have ever done… literally. The Kalalau has a reputation for being one of the most dangerous hikes around, and for good reason. The hike itself is not crazy physically challenging (22 miles round trip and only around 800ft of max elevation gain at a time), but the trail can be frequented by rain, mud, and flash floods that you wouldn’t want to catch up with you while you’re on the side of an open ocean cliff.
While ~90% of the hike is fine… there is 5-10% of the trail which allows you little to no room for error. You cannot hike and take in the views at the same time because you need to focus 100% on your next step. Even if you do everything humanly right, you cannot control external forces such as a sudden change in weather, falling rocks, landslides, and trail erosion, any of which can put you into a very undesirable situation.
We got lucky with beautiful weather and ideal dry conditions; but honestly, I don’t think I would really want any of my loved ones attempting this hike. Risk to reward ratio is questionable… plenty of beautiful (and safer) hikes out there. But if you’re gonna do it anyways, here’s some information to help you out!
About the Hike
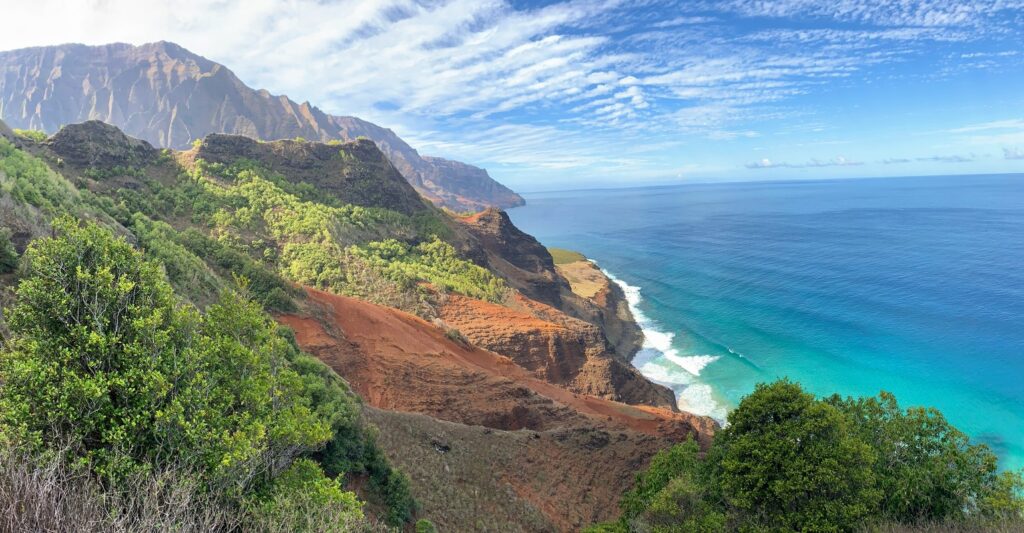
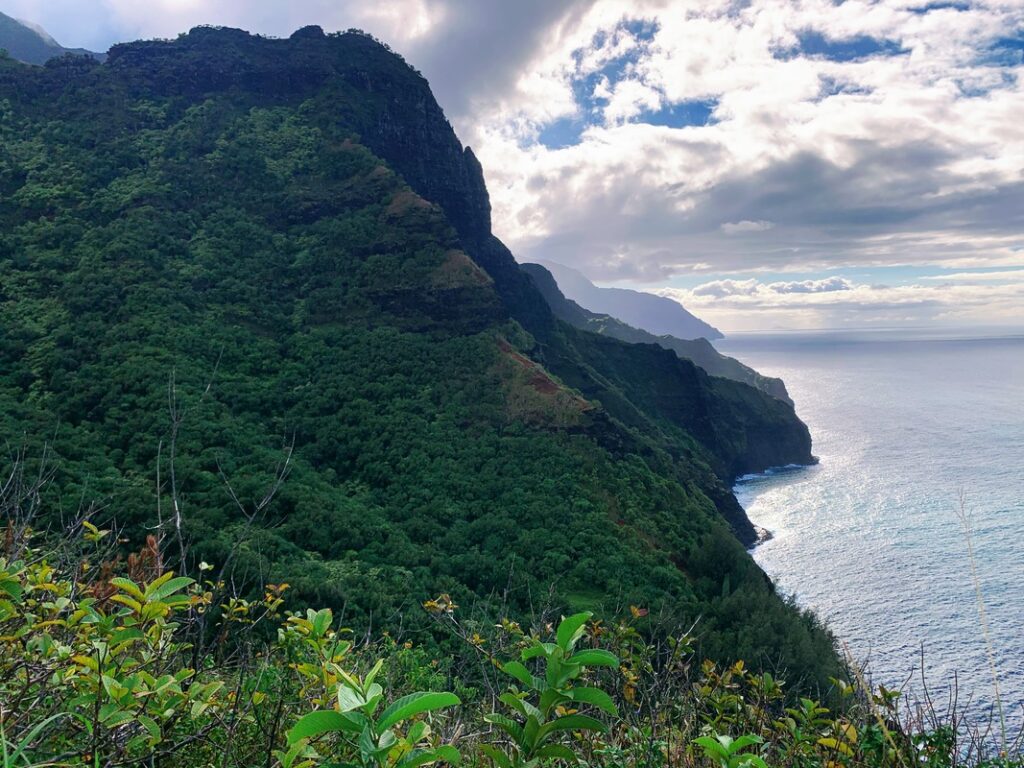
This hike involves walking along seaside cliffs, trekking through mud, and several river crossings. You will get to see epic views of the coastline covered in a lush green jungle forest full of vegetation and wildlife. The trail is 35.4 km or 22 miles out and back.
You can do the first two miles to Hanakāpī’ai Beach without a permit and can take an additional side trail two miles to Hanakāpī’ai Falls with a day pass if you want. To continue from Hanakāpī’ai Beach to Hanakoa Valley and onwards to Kalalau Beach, you must have a permit.
You should only attempt hiking past Hanakāpī’ai Falls if you are a very experienced hiker with proper gear and equipment. Emergency resources are limited on Kauai and Kalalau beach is extremely remote and hard to get to; help, if needed, may not be able to arrive immediately.
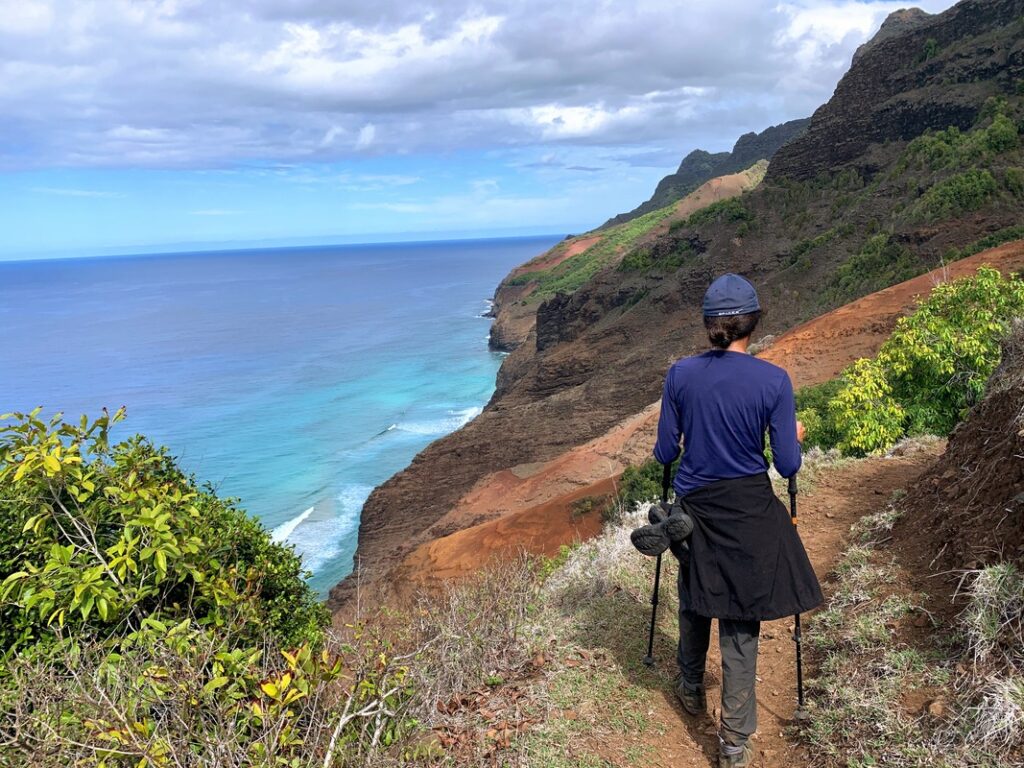
Do NOT attempt this hike if weather conditions are not ideal, as rain can lead to flash flooding of the rivers which can make them unsafe to cross. You should be comfortable hiking this type of mileage and in decent physical shape. Proper hiking shoes are a must as you will need all the ankle support you can get in that slippery mud. Trekking poles helped tremendously.
Although there are many sources of water on this trail to refill, you need a filtration or purification system with you as dehydration and heat exhaustion/heat stroke can also occur from Hawaii’s beaming sun. Make sure you are implementing sun protection via UPF clothing and/or sunscreen reapplied every 2-4 hours.
If you are afraid of heights, I would NOT recommend this hike.
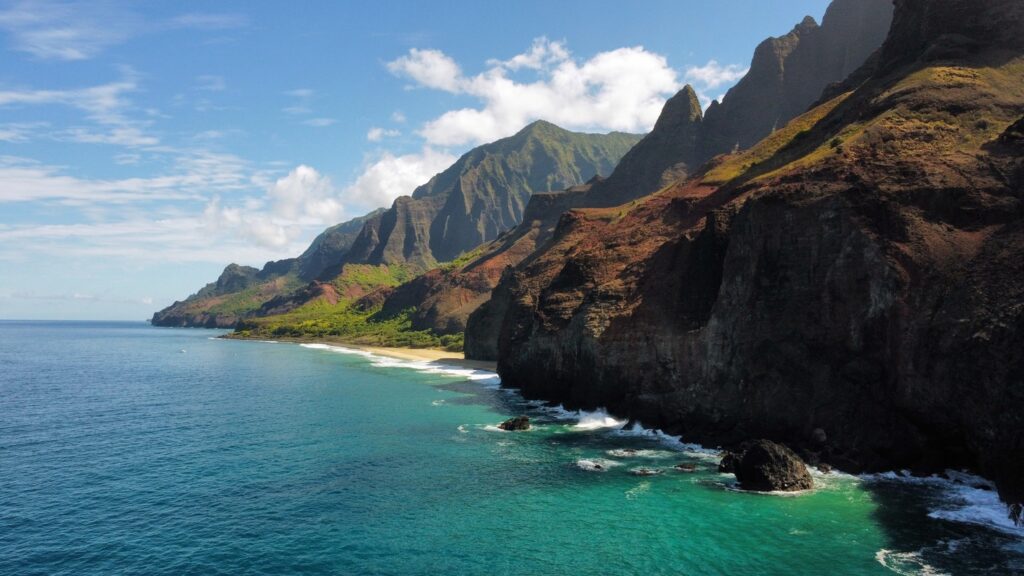
You will be rewarded with epic viewpoints, serene waterfalls, and access to one of the most beautiful, remote, and sacred beaches on the planet. Treat the journey with respect. Be aware and cautious always and come prepared. It will be an unforgettable experience.

Before You Go
Permits vs Day Pass
If you only want to hike to Hanakāpī’ai Beach (~mile 2) you do NOT need a permit.
If you want to take the side trail from Hanakāpī’ai Beach (~mile 2) to Hanakāpī’ai Falls (an additional 2 miles, so an extra 4 miles round-trip) you need a day pass. You can get day passes for free from the Napali Coast Park Website.
You can ONLY hike past Hanakāpī’ai Beach towards Hanakoa (mile 2) with a permit, even if you are not planning to camp. When we arrived at Hā’ena State Park, a park ranger immediately approached us and asked to see both our permits and our IDs. The IDs must also match the names on the permit, I guess as a way to limit permit selling outside the park.
The park ranger also asked us several questions about our preparedness and gave us a very helpful summary of current trail conditions before sending us on our way. It was appreciated.
To obtain a permit to hike the Nā Pali Coast, you need to make a reservation on camping.ehawaii.gov as well. Camping permits cost $35/night and there is a 5-day maximum. Obtaining a camping permit can be competitive and they are only available 90 days in advance, so make plans accordingly. The only two available campsites along the trail are Hanakoa (~mile 6) and Kalalau (~mile 11).
What to Take
- Take legit hiking boots. Your cute shoes will be destroyed by the mud. You can avoid an ankle injury with solid high-ankle boots (ideally waterproof)
- Take at least 1 extra pair of dry socks (assume the pair you wear in will be mud soaked by the end of the day)
- Comfortable hiking outfit. We prefer hiking pants (to protect from all the bugs and overgrown brush) plus a sun shirt with UPF protection (this Brazilian brand Litoraneus is our absolute favorite)
- A packed second similar dry outfit (in case you get rained on or fall in mud)
- Rain jacket +/- rain pants or gaiters if you have them
- Rain cover for your pack
- A hat and sunglasses for sun protection
- Sunscreen
- Bug spray (lots of mosquitos especially near water sources)
- Water filtration system (we love the Katadyn BeFree water bottle)
- Camelback or water bladder to carry additional water (you should be drinking at least 3-4L each day with this level of heat and exertion)
- An appropriate amount of food and snacks depending on how long your trip will be (+ at least 1 emergency meal in case some external force causes you to be on the trail longer than expected)
- Jet boil (camping stove if your meals require adding boiling water)
- Trekking poles (these saved our butts countless times from a swim in the mud)
- GPS and a compass (we use AllTrails Pro for our GPS in addition to carrying a paper map)
- While not a requirement to do the hike, the park rangers do recommend carrying a satellite phone in case of emergencies
- Tent and sleeping pad (we actually didn’t bring our sleeping bags since it was so hot camping in Oahu. We used our Rumpl blanket and it was just fine)
- Bathing suit (for waterfall swims)
- Portable charger + charging cable
- Camera
- Headlamp with extra batteries
- Emergency kit (medicine, basic first aid, an emergency blanket, fire starter, splint)
Safety: Heat Exhaustion vs Heat Stroke
Some basic medical education can go a long way. Heat exhaustion and heat stroke both fall under the broader category of exertional heat-related injuries, but are very different.
Exertional heat-related injuries can happen in situations where both your body is producing a lot of heat (due to the exertion) and also receiving a lot of external heat from the environment. This double heating can overwhelm the body’s thermal regulation system leading to an increase in your core temperature. Risk factors for overheating include strenuous exercise in hot or humid environments (ahem ahem), poor physical conditioning, obesity, dehydration, and certain drugs.
Symptoms of heat exhaustion include headaches, nausea or vomiting, dizziness, muscle cramping. Treatment includes getting out of the heat, rehydration, electrolytes, and good old-fashioned rest. Take a big lunch break in a shady spot if you are feeling any of the above. Thankfully Kalalau Trail weaves in and out of the mountain jungle canopy, so you will always have some shade on the way soon after those sun-exposed cliffside switchbacks.
Heat stroke is much more serious and involves neurological symptoms such as confusion, problems with balance, or seizures. This is a medical emergency and this individual needs to be cooled down immediately.
The most effective technique to rapidly bring down someone’s core body temperature in this situation is via evaporative cooling. First, remove the patient from the environment: take them out of the sun and to a cooler location with shade. Next, remove the person’s clothing and spray cool water all over their skin while fanning with a flat object. Use your satellite contact device to call for help and continue spraying and fanning until help arrives.
Evaporative cooling can save someone’s life.
How to Get There
Follow the road to the North Shore and it will eventually end at Hā’ena State Park. The Nā Pali Coast Trail starts at Kē’ē Beach inside the park (which by the way is supposed to be an excellent beach for snorkeling).
If you are planning on camping, you have two options for overnight parking.
- There are limited overnight parking spots within Hā’ena State Park, but you must get these IN ADDITION to your camping permit. These can be found on the Go Hā`ena website. Do NOT leave any valuables (or really anything) in the vehicle and we were told to hide our parking permit to discourage break-ins. Parking in this lot REQUIRES a permit first, so we’d recommend securing your permit before your parking pass.
- If you are unable to obtain an overnight parking permit, you can pre-book a shuttle ride into the park. This can be arranged through Waipa Park and Ride in Hanalei or the Go Hā`ena website.
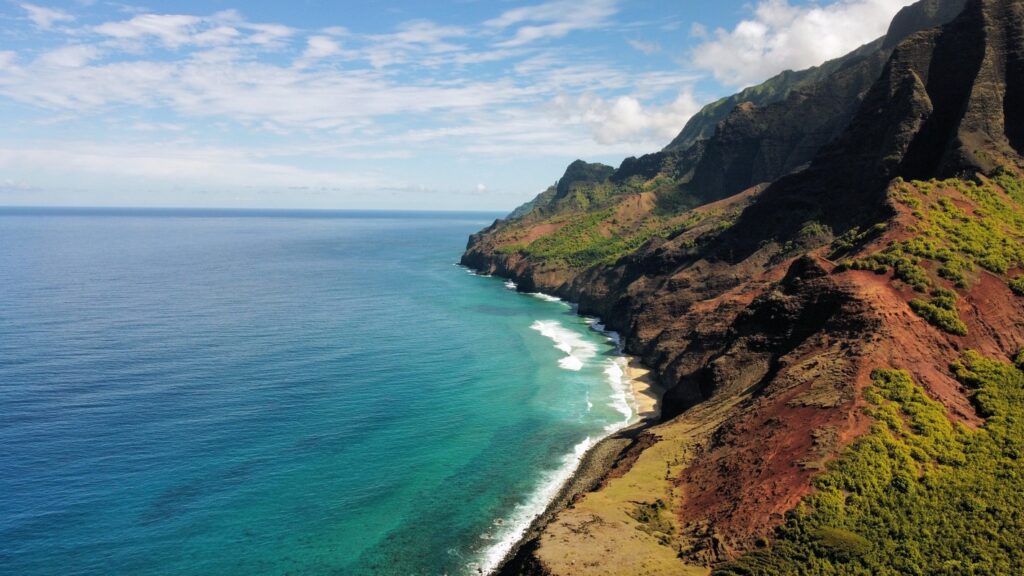
Hiking The Nā Pali Coast
The Nā Pali Coast is incredible and everyone should check out at least part of it! We were originally planning on just hiking to Hanakāpī’ai Falls and back, but got lucky and we’re able to obtain two last-minute camping permits thanks to the browser-refreshing gods. Even then, due to the dangerous reputation of the Kalalau Trail, especially Crawler’s Ledge (mile ~7), we were only intending on hiking to Hanakoa Falls (mile 6) and camping there for two nights.
Our decision to continue was influenced by several people we met throughout the day (in addition to our bubbling curiosity). First, the park ranger at the start of the hike told us the hardest part of the trail was miles 2-6 from Hanakāpī’ai beach to Hanakoa Valley. She also told us Crawler’s Ledge is solid rock, so that part of the trail is actually safer than the Pohakulumano portion (right before Crawler’s Ledge) and Pōhakuao portion (mile 9), both of which are struggling with trail erosion.
We then met a couple of ladies in the thick of mud around mile 5 who told us the second half of the trail “was a breeze!” compared to the first half. Just like everyone else we passed by, they assured us that everything was fine and there was nothing to worry about.
The tipping point was when we met a sweet older couple from California at our campsite at Hanakoa Falls. Keith told us he was afraid of heights. Then Keith told us he walked right by Crawler’s Ledge and didn’t even know he was on it! Thanks, Keith.
This is a perfect example of sampling bias. When the population you are surveying may not represent the general population. The people you meet on the Kalalau Trail are not your average Joes. These are thrill-seekers and adrenaline junkies. Take everything you hear with a grain of salt and exercise caution in planning and executing your trip based on your comfort level. Be honest with yourself.
Routes
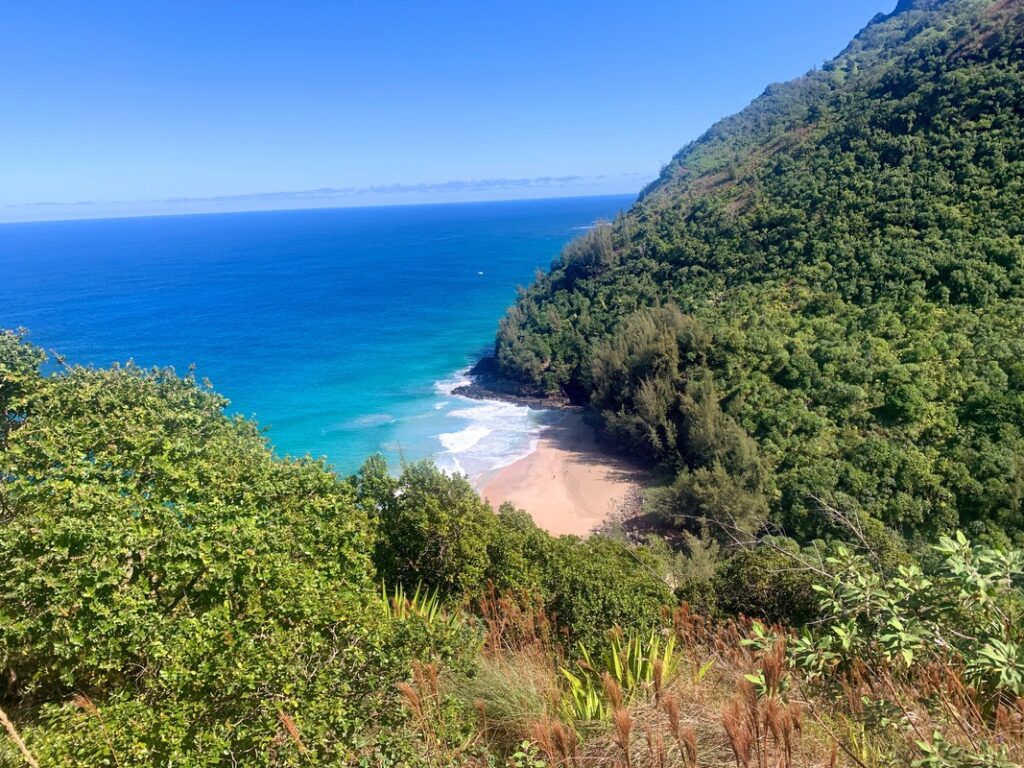
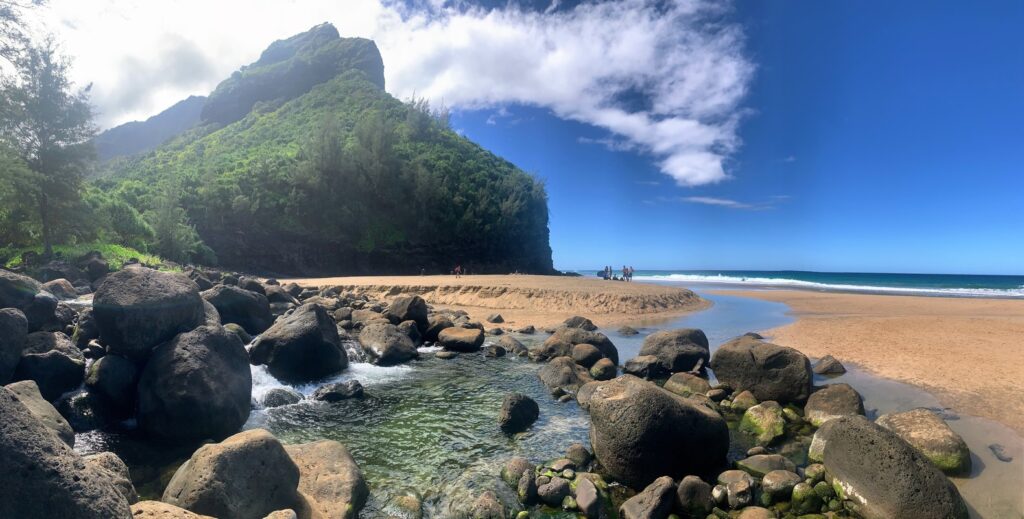
Kē’ē Beach to Hanakāpī’ai Beach
2 miles (~3.2 km) to the beach.
4 miles (~6.5 km) out and back.
Beautiful views with an amazing beach and one river crossing. Everyone should do this portion of the hike. Very doable but be prepared for hiking in the mud.
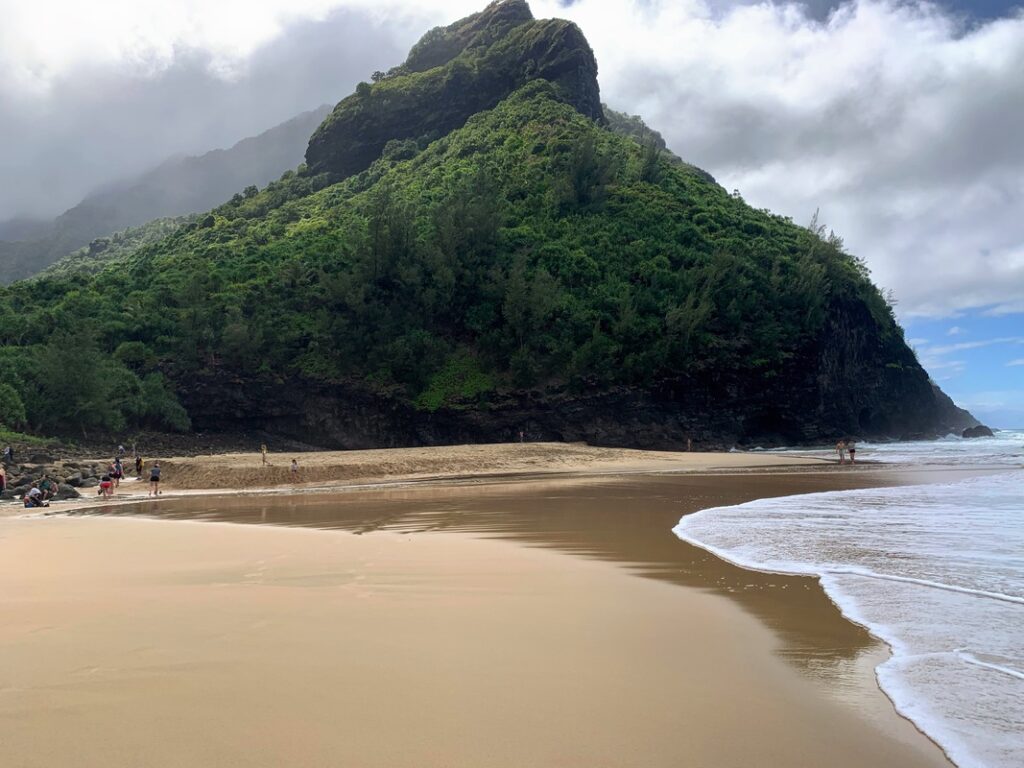
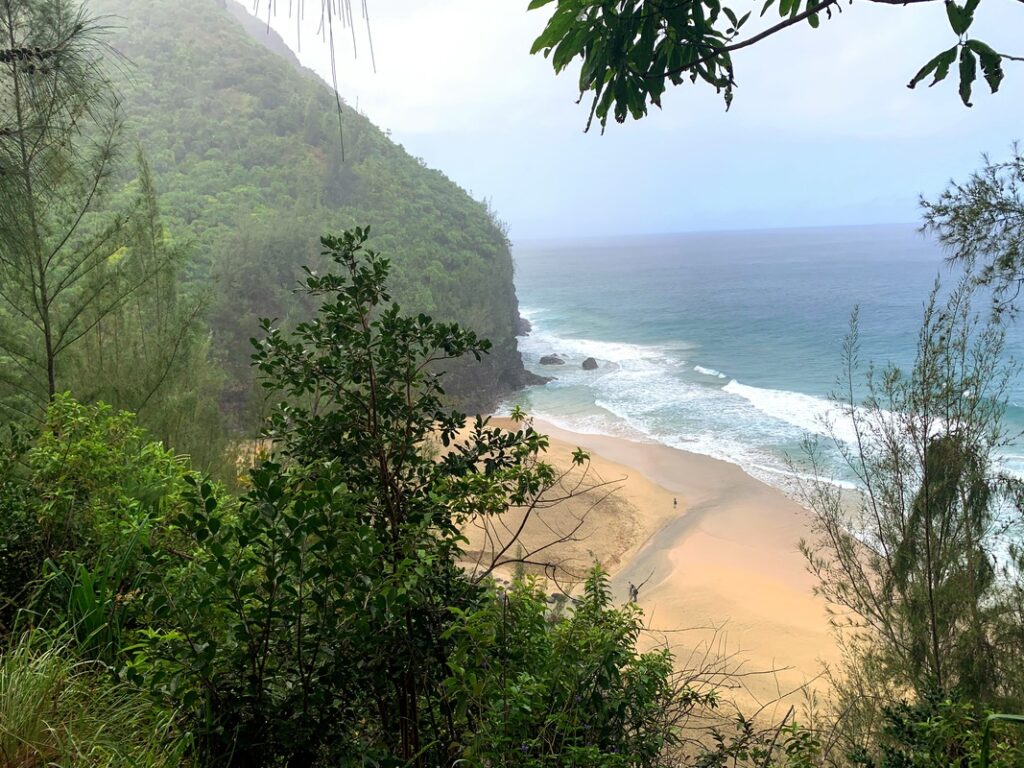
Swimming at Hanakāpī’ai Beach is discouraged (especially in the winter) due to high surf, strong currents, and rip tides. Bring water and a picnic lunch for the beach, it is an incredible hike and much safer than its tail end. Hanakāpī’ai Beach has a composting toilet and plenty of lounging area, but no camping.
Hanakāpī’ai Beach to Hanakāpī’ai Falls
2 miles (~3.2 km) to the waterfall from the beach.
4 miles (~6.5 km) round trip, back to the beach.
8 miles (12.9km) round trip from the start of the hike.
An additional 4 miles (~6.5 km) out and back. The side trail to Hanakāpī’ai Falls branches off from the bathroom area of the beach. From the beach to the waterfall is an additional 2 miles (~3.2 km) which would make your entire trip a total of 8 miles (~12.9 km).
This is an excellent option for anyone who wants to explore more of the Nā Pali Coast but couldn’t get a camping permit. The hike up to the waterfall is apparently pretty strenuous and there are a lot of ankle-injury potentials, so be careful. If you do make it to the waterfall, it is supposedly an excellent swimming spot so bring your swim trunks! Try to go early to avoid crowds.
If you are planning on trekking the Kalalau Trail, our park ranger recommended NOT stopping at Hanakāpī’ai Falls as those 4 miles can use up a lot of daylight and exertion. Best to save your energy. We took her advice and skipped the waterfall. If we were to come back to Nā Pali Coast in the future, I would do this route.
Hanakāpī’ai Beach to Hanakoa Valley
4 miles (~6.5 km).
Both according to the ranger and our own experience, this is the hardest part (physically) of the trail. It also takes you on some incredibly narrow sections of trail on cliff edges, with just some light brush between you and an 800 ft fall into the ocean. It can be very muddy, so watch your step, not the views!
We had light rain on our first day and were trekking ankle-deep in wet mud. It’s strenuous ups and downs and the 4 miles felt more like 5 due to the mud. Mud is common here since this portion of the trail is more canopied and therefore shaded from the drying Sun.
Hanakoa Valley has a composting toilet, two shelters with a picnic table, and very few campsites. They are all near the Hanakoa stream so that helps drown out sounds from potentially close-by neighbors. There are some additional campsites right at the beginning of the Hanakoa Falls Trail, one of which is next to an excellent spot for a cold waterfall shower in the Hanakoa stream. This was one of our favorite parts of the hike.
If you were to hike from Kē’ē Beach to Hanakoa Valley and back your total trip would be 12 miles (~19.3 km).
Hanakoa Valley to Hanakoa Falls
Less than 1 mile (~1.6 km) out and back.
We saw the falls on the way into the valley but didn’t have the energy or desire to trek to Hanaoka Falls after our refreshing dunk in the stream above. You can also swim at Hanakoa Falls.
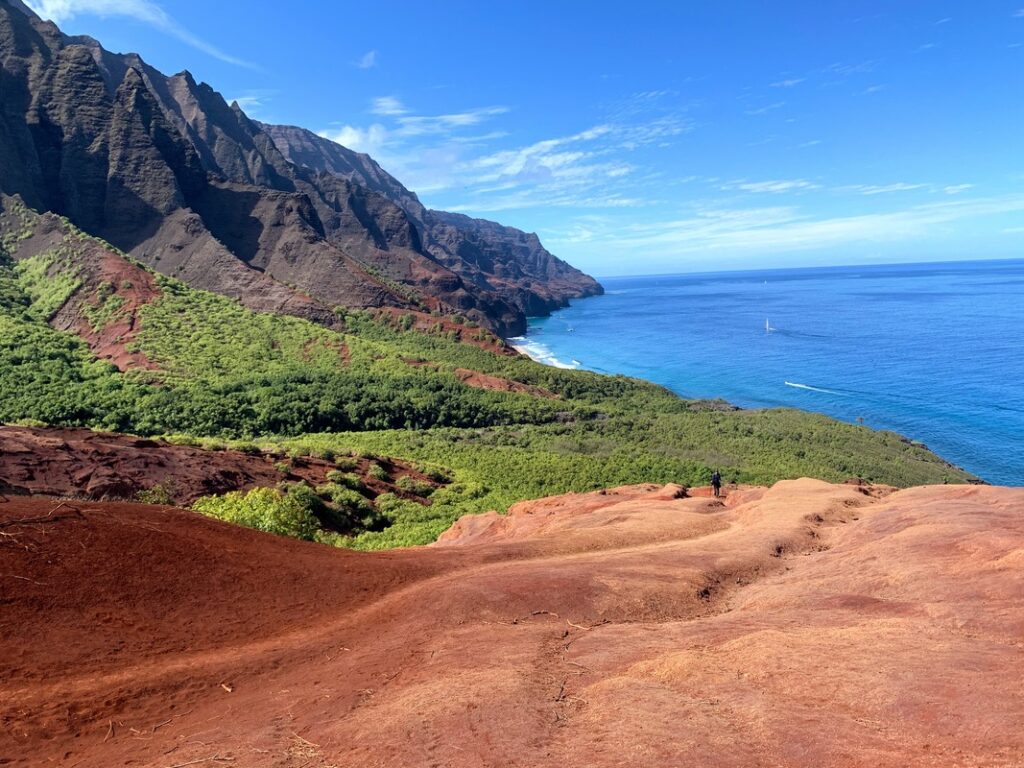
Hanakoa Valley to Kalalau Beach
5 miles (~8 km).
Less strenuous physically, more strenuous mentally. Now we’re in the big leagues. Three more stream crossings, the infamous Crawler’s Ledge, and a steep descent down the Red Hill before reaching Kalalau Beach.
If you were to hike from Kē’ē Beach to Hanakoa Valley and back your total trip would be 22 miles (~35.4 km). Crawler’s Ledge is quite scary for those with a fear of heights, but it is actually a less dangerous portion of the trail compared to the mile after it. It is at least solid rock and easier to keep your footing.
AFTER Crawler’s Ledge, the following section really requires full attention on each and every step. A steep, eroded cliff face with a narrow loose gravel/dirt trail is the challenge. While this section is short, give it 100% full focus as you do NOT want to slip here.
Kalalau beach rewards you with beautiful white sand and no crowds. Congratulations, you made it to one of the most remote beaches to access in the world. Is it crazy different from being at Hanakāpī’ai Beach 9 miles ago? Ehhhhh….. I think getting to this bucket-list beach is more about the adventure. Is it worth the risk? Questionable.
Stop at Hanakoa and do NOT continue to Kalalau Beach if weather conditions do not look promising. Hundreds of people need rescuing from the Kalalau Trail every year, often due to under-preparedness or bad weather. Don’t be those people.
Summary
If you are not a big hiker, go to Hanakāpī’ai beach and back. You do NOT need a permit.
If you are looking for a little more Nā Pali adventure, do the extra two miles to Hanakāpī’ai Falls and treat yourself to a waterfall shower in Jurassic Park. Get a day pass.
Only continue hiking to Hanakoa Valley and Kalalau Beach if you have a permit, hiking experience, and a slightly shrunken amygdala. HIKE AT YOUR OWN RISK.
Learn more about the trail and its current conditions on All Trails.