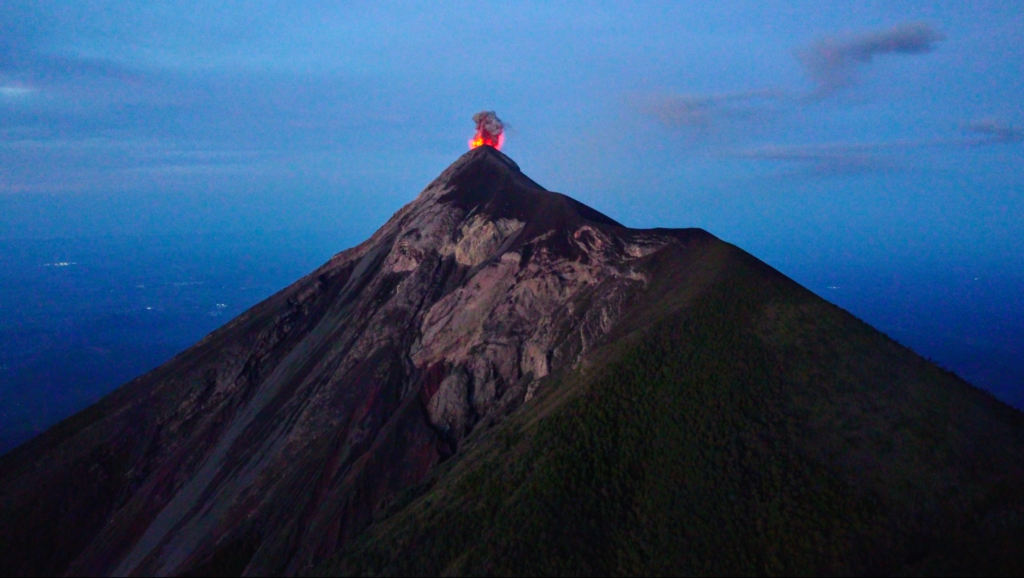
Climbing the Acatenango volcano to watch eruptions from its sister Volcán de Fuego is one of the most epic hikes we have ever done. Imagine falling asleep with eruptions of glowing red lava as your view and then watching sunrise from the rim of an even taller volcano’s crater. Absolutely INCREDIBLE. If you have ever wanted to see an active volcano up close, add hiking Acatenango to your bucket list.
About The Hike
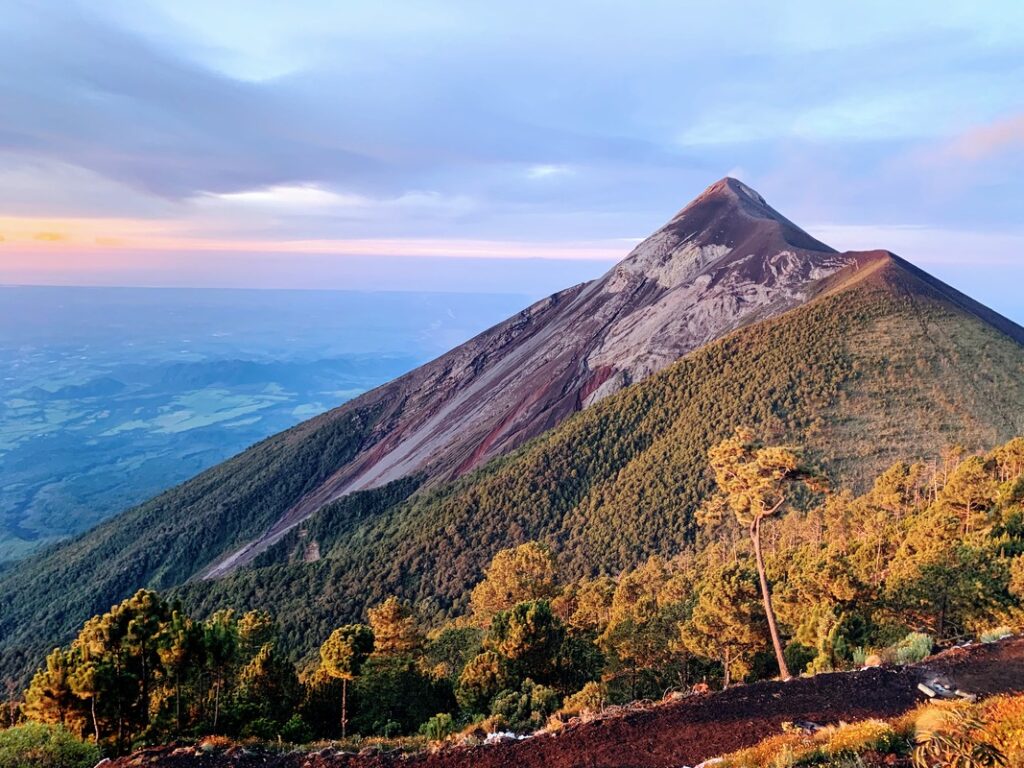
Acatenango is a dormant volcano near Antigua in Guatemala. Climbing to the top will give you views of Acatenango’s sister volcano, Volcán de Fuego, an active volcano with small eruptions occurring regularly every 15-20 minutes. The two volcanos are collectively known as La Horqueta.
The peak of Acatenango is 3,976 m (13,045 ft) and Fuego is 3,763 m (12,346 ft). Since 2002, Volcán de Fuego has been in a new active period, with more or less continuous low-level activity, although there was a larger eruption in June 2018 which buried some nearby villages and killed over 100 people. Fuego is an active volcano. On Acatenango, you will be on a nearby peak at a safe distance from Fuego’s activity, but still hike at your own risk. ¡Con cuidado!
Climbing Acatenango is a difficult and strenuous hike. It is listed as a 13.4 km (8.6 mile) out and back trail with 1601 m (5,252 ft) of elevation gain. It will basically be 6.7 km (4.3 miles) straight uphill, sometimes at a very steep incline and on loose volcanic gravel. It will take anywhere between 4-7 hours to get to basecamp depending on your fitness level. Downhill is easier in regard to exertion, but harder on your joints. It can take between 2-4 hours downhill from the summit. You should be in decent physical condition before deciding to do this hike. It is hard, but SO WORTH IT.
There are many tour groups that you can book with to overnight hike Acatenango. They seem to be pretty affordable and will provide you with a guide, meals, camping equipment, a fire, and some will even carry everything for you. Lonely Planet recommends Old Town Outfitters (~$168) and Selena (~$78) offered a similar tour. We did not use a guide and instead decided to backpack the trail on our own. We ONLY recommend doing this if you have significant prior backpacking experience and proper gear.
Before You Go
When To Go
The main reason most people go on this hike is to watch the eruptions from Volcán de Fuego. It would be a shame to hike all the way up there and never have views of the exploding lava. To increase your chances of a good show, we recommend going during the dry season between November and April. Hiking this trail during the wet season may mean fog and clouds obstructing your views of the eruptions. We actually met a couple that did this hike but were not able to see anything at all due to cloudy weather. Sucks!
What To Take
- Comfortable hiking outfit: such as a sun shirt and leggings/hiking pants. Imagine climbing up 4 miles of stairs, you will get hot and sweaty!
- Sun protection: sunscreen, hat, sunglasses.
- Hiking boots: sneakers will get by, but if you have trail shoes it will definitely be better.
- Trekking poles: never used them before this hike, but they definitely helped on this trail.
- A map +/- GPS: we use AllTrails Pro, which you can use offline. Can also try Maps.me.
- Headphones: music helps!
- Camera/phone: you will definitely want some photos of this one.
- A portable charger and cord: trust me, you will want photos the following day too.
- Water/hydration pack: 3-4L per person would be ideal. There are NO sources of water on this trail.
- Headlamps or a flashlight: your tour group may provide this, but it is always a good idea to carry for walking in the dark.
- Warm layers: it can get below freezing near the top of the volcano. We recommend packing a thermal underwear layer, additional warm layers such as wool, a puffer jacket.
- Gloves, scarf, warm hat, extra socks for the cold
- Rain jacket: weather can change fast and dramatically.
- Snacks
- Emergency kit: medications, basic first aid, an emergency blanket, fire starter, splint.
- Q50 for the entrance fee and additional cash if you plan to buy any food or drink along the way.
If Backpacking, also bring:
- Tent and rain flap
- Sleeping bag/pad
- Rain cover for your pack: no one wants to deal with wet gear.
- Snacks and enough food for 2 days
- Jet boil: if needed for any of your meals.
Altitude Sickness
One thing that Emergency Medicine has taught us is that preparation is everything. Always be prepared for the worst, just in case. Anyone traveling above 2000 m (6,500 ft) is at risk of developing acute mountain sickness AKA altitude sickness. One meta-analysis found that for every 1000m (3,300 ft) increase over 2500m (8,200 ft), there was a 13% increase in the chance of developing mountain sickness. Symptoms can range from headache, lightheadedness, nausea, vomiting and disturbed sleep.
We recommend giving yourself a day or two in Antigua (1533 m) to acclimatize. Drink plenty of water before hiking as hydration may help prevent symptoms. If you are planning to climb, you can also talk to your doctor about whether taking a medicine called acetazolamide for prevention would be a good idea. NEVER take any medications without talking to your doctor first. It is recommended that you take 150mg twice daily starting 24 hours before your climb for prevention. If you experience mountain sickness symptoms you can also take 150mg at that time for treatment. Do not keep climbing if you continue to experience symptoms.
Although rare, other more dangerous altitude illnesses such as high-altitude cerebral edema and high-altitude pulmonary edema can occur at elevations above 3000-4000 m (9800-13,000 ft). If you or anyone in your group ever develops symptoms of confusion, drowsiness, imbalance, cough, shortness of breath not improving with rest, or pink frothy sputum you should descend IMMEDIATELY and seek medical attention. DO NOT KEEP CLIMBING. THE ONLY TREATMENT IS DESCENT.
Can I hike without a guide?
We only recommend hiking without a guide if you are an experienced backpacker with all necessary gear. When we got to basecamp registration, there were signs saying that you could only hike with a guide, however when we spoke to registration we assured him that we had plenty of experience, 2 maps, GPS, had studied the trail, and had all of our own gear. He let us continue but advised us NOT to camp at the summit. We agree- you should NOT camp at the summit. Temperatures can drop below freezing, winds can be brutal, and it only gets colder the higher in elevation you go. There have been deaths in the past due to hypothermia. ONLY camp at basecamp below the summit. Depending on who you encounter at registration, there is a chance they may force you to go with a guide.
How to get there & back
From Antigua: If you are with a tour group, you will likely have transportation arranged for you and can skip this section. If you are solo-hiking, you can either take a taxi straight to the Acatenango trailhead or save some Quetzals by taking public transportation. We will explain how to use public transportation below or you can check out our Google Map at the end of this page:
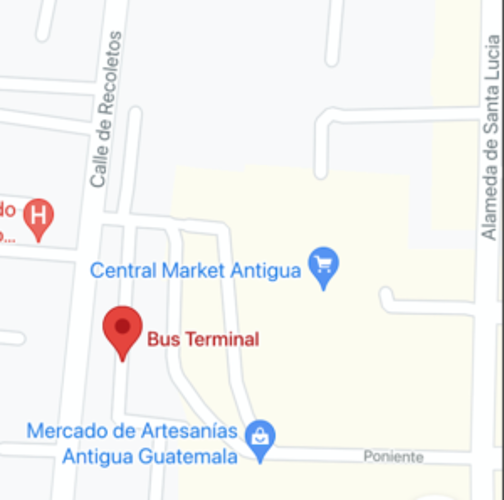
Go to the Main Bus Terminal in Antigua (see above) and take the chicken bus going to Parramos (~5Q). From Parramos (A below) you will cross Parque Parramos and take another chicken bus (~10Q) to La Soledad (B below). Tell the ayudante (helper) that you are going to Acatenango, that way they will drop you off right at the trailhead which is located just outside of La Soledad.
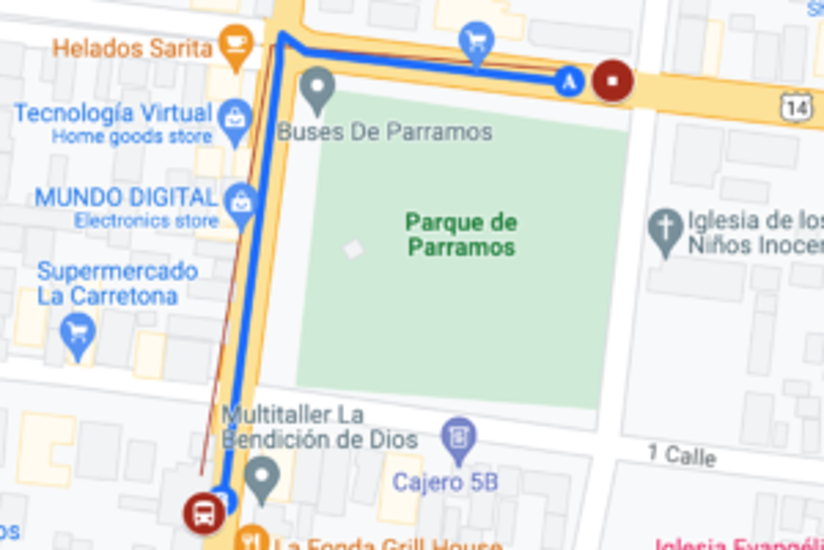
The public transportation route took us approximately 1.5 hours. You can download our offline Guatemala Google map below with exact locations of bus stops. If you have never been on a chicken bus before, be prepared for a wild experience! They are fast, crowded and sometimes maniacal, but will get you to your destination pretty efficiently and for a very cheap price.
The bus going to La Soledad (where the trail is located) is less frequent than the bus going to Parramos. You may have to wait 30 to 45 minutes. We were able to hitch a ride from the La Soledad bus stop to Acatenango for 10Q each. On the way back, you can take the route in reverse. The bus stop back to Parramos is right where the trail ends on the side of the road. Make sure to be there by mid-afternoon to reliably catch a bus back to Parramos.
The Trail
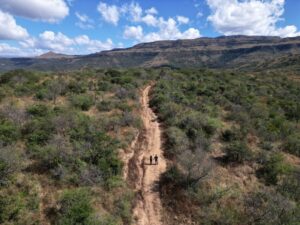
Aside from the amazing eruptions and lava flow you will watch at the top of Acatenango, the entire trail is quite beautiful the whole way up. You will be passing through 4 ecosystems on the way up and the weather when we went in October was perfect hiking weather- cool but not freezing. I will describe the hike and divide it into its 4 ecosystems.
Ecosystem 1: Farmland

The bus from Parramos will drop you off right across the street from the Acatenango trailhead. Before starting, make sure you take some time to stretch and double check your belongings. Keep rain-gear easily accessible in outside pockets in case you need to quickly access them!
The hike starts off going through a steep, loose-gravel path surrounded by farmland. Approximately 20-30 minutes into the hike you will reach a cute little restaurant. Moderate pricing (for Guatemalan standards) but it was a nice stop. We got crepes and fresh orange juice on the way up and stopped for some breakfast tipico (eggs, plantains, beans, avocado, tortillas) on the way down. The restaurant has stunning views, nice outdoor seating, and a cute ACATENANGO sign. After the restaurant is when you can really start to appreciate the beautiful farmland. We saw corn, lots of berries, and plenty of wildflowers on our way up.
Ecosystem 2: Rain Forest
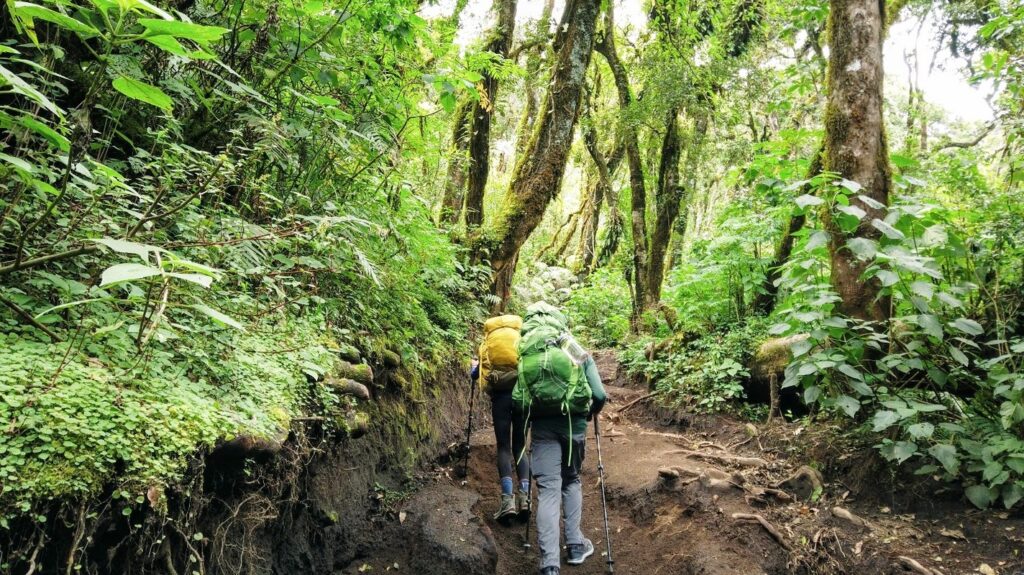
The land will gradually transform from farmland to forest, giving you some much needed shade for the next portion of the hike. Shortly after hitting the forest, you will encounter registration. Here you will fill out a form with contact information, check in, and pay 50 quetzals per person for the hike.
A few minutes after registration you will come to an unclearly marked fork (approximately 1 mile into the hike) where you can choose the green route (right) or red route (left). The green route is a more gradual incline but takes longer. The red route is a steeper incline but saves you some time (one guide told us it can save you an hour). They both connect eventually so pick your poison.
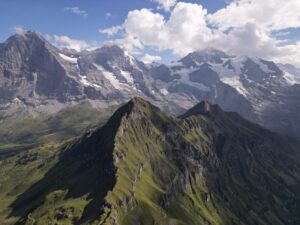
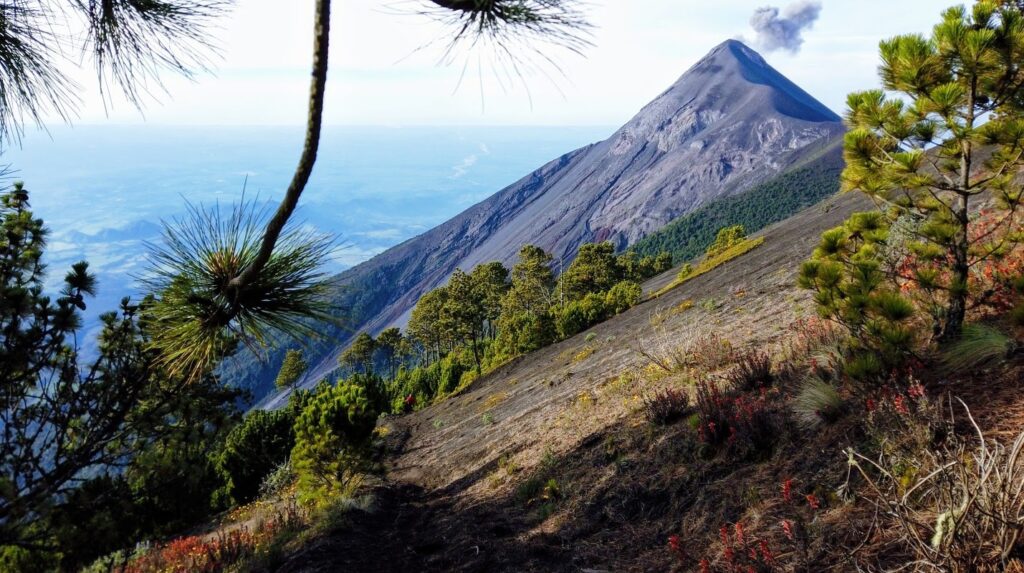
Ecosystem 3: Alpine Forest
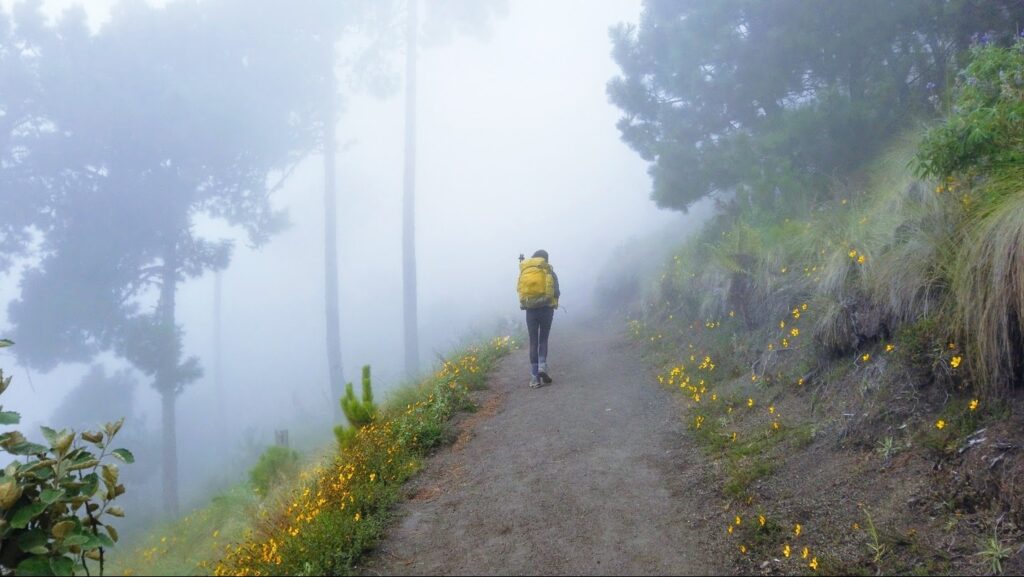
After the connection of both trails (at approximately 2 – 2.2 miles in) you will hit a sign that says “ALTO Fin De Camino” (this is meant for the road, not the trail) which you must walk past and the trail will continue down and to the right. At this point the terrain resembles more alpine meadows surrounded by lots of pine trees and colorful wildflowers. You will be at cloud level here, expect misty weather. Continue up and you will eventually hit three forks (at about 3.3 miles in) which lead to different base camp areas.
Ecosystem 4: Volcanic
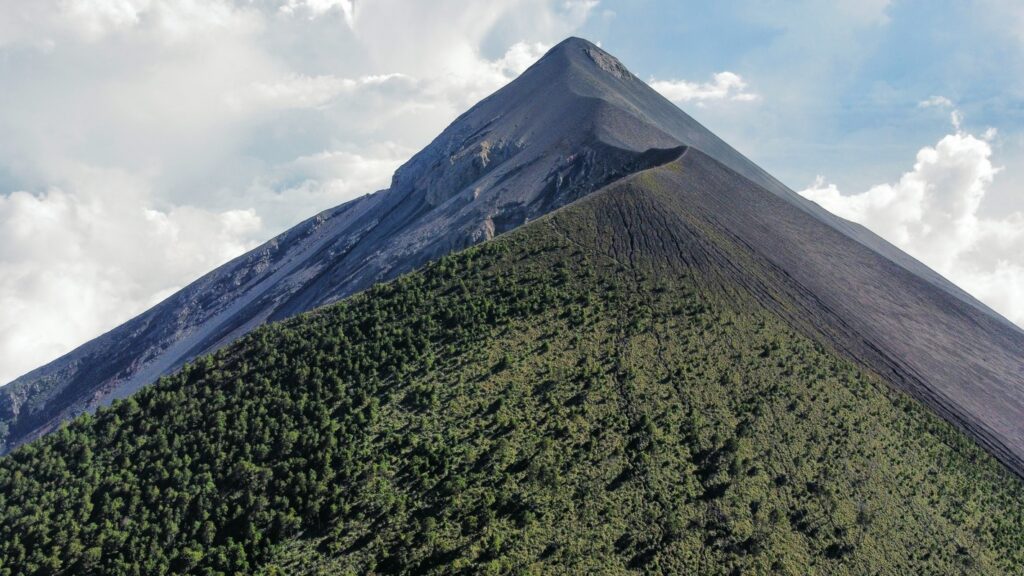
We took the furthest right fork and set up our camp on some flat ground right off the trail. Seems like there are plenty of flat areas around the entire base camp area to set up tents. The views of Fuego from this entire area are unreal. We had some rain and some cloudy moments with poor visibility but luckily the weather changes pretty quickly this high up. Definitely bring rain-gear, a wind breaker, gloves, a hat, a thermal layer, and a puffer jacket as it gets pretty damn cold up near the top.
You can do this hike as a day trip, but I would definitely recommend camping overnight if you can. When there is any day light, the eruptions mostly look like clouds of smoke and you cannot fully see the lava. But in the darkness you can really appreciate the lava. INCREDIBLE. Guided groups had campfires which would have been nice in the cold. We were pretty wiped out after our climb, so we heated up our three-bean chili, ate it inside the tent, and spent the night watching eruptions from our sleeping bags. Unreal.
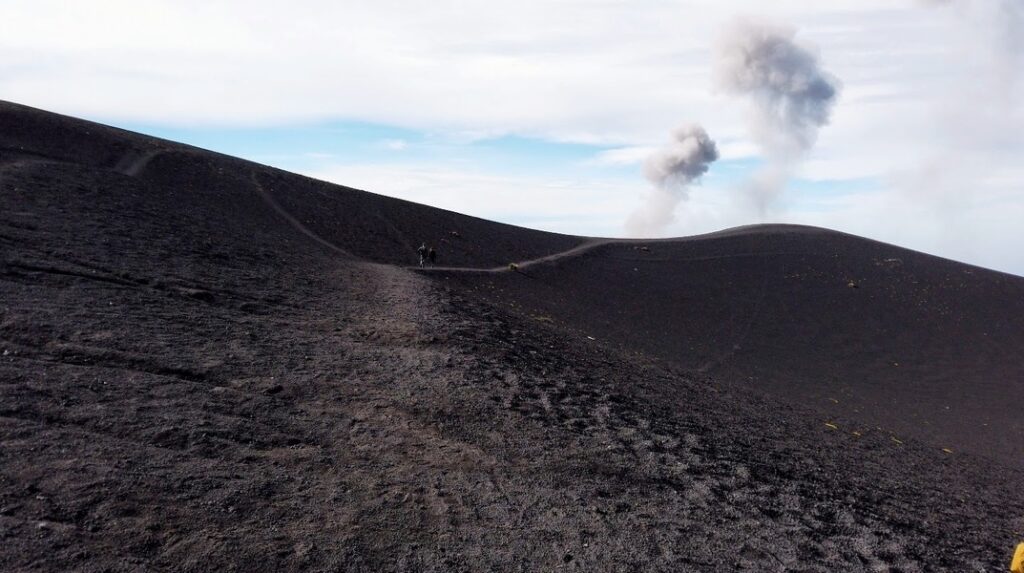
The Summit
We hiked to the summit of Acatenango in the morning. All of the guided groups head to the summit at 4am to catch sunrise (which was our original plan), but we had trouble finding the trail in the darkness with our headlamps. We ended up watching sunrise from base camp (which was still epic!). It was much easier to find the trail in the daylight and it is marked by wood scrapings and some occasional tied pieces of plastic.
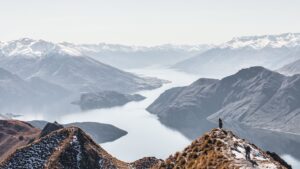
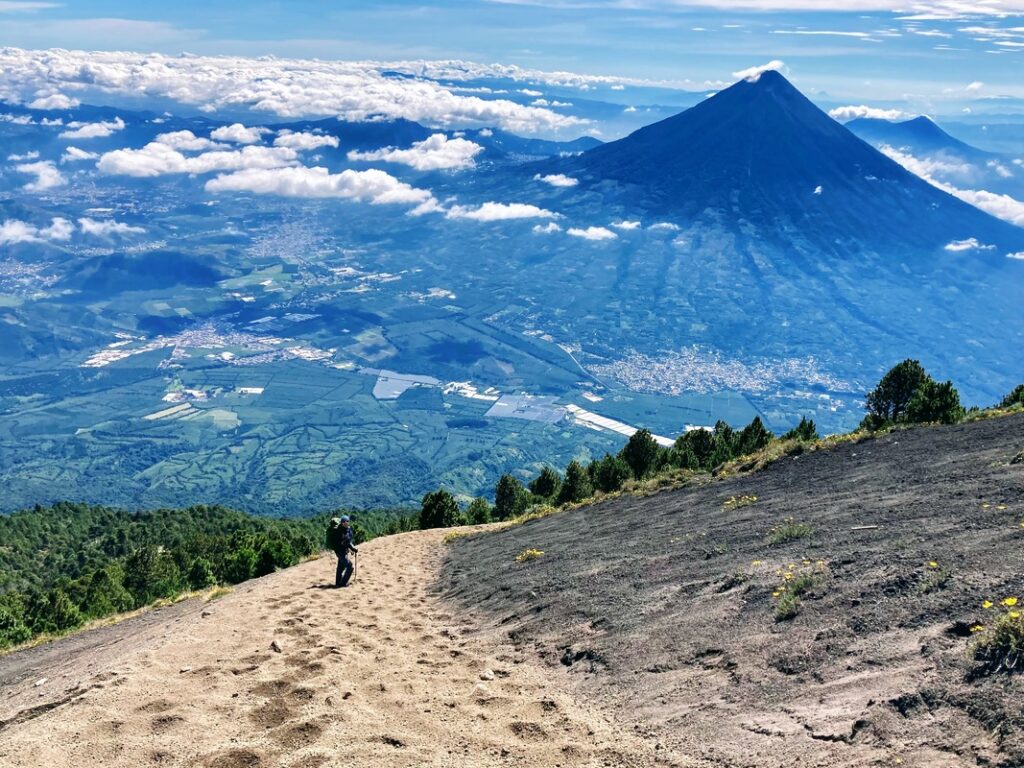
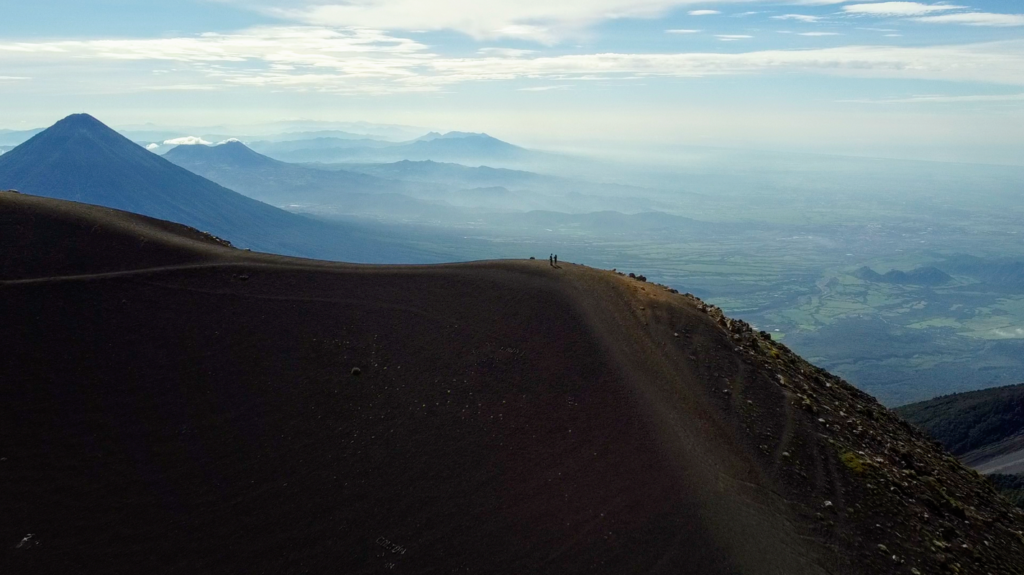
Hiking the summit was probably the hardest portion of the hike due to the steep incline on loose volcanic gravel. It feels like two steps forward, one step back. Having trekking poles definitely helped. Because we went to the summit a little later, we had the crater all to ourselves which was awesome! We were above the clouds and had 360-degree views of what seemed like endless volcanos. EPIC.
The hike down is an annoying steep decline for about 3 hours. My quads and knees were crying the next day. This was the most amazing hike we have ever done. 10/10 would recommend.
Check out our video above to see some of our footage of Acatenango and Volcán de Fuego in action.
Map
Use our Google Map below for the route from Antigua to the Acatenango trailhead or access it here.