The Salkantay trail is one of our favorite treks to date. It is an alternative to the famous “Inca Trails” which take you through the Peruvian Andes, lush forests, over a mountain pass, and all the way to Machu Picchu. In our opinion, the Salkantay is a much cooler route than the Inca trails because
- It is less touristy and therefore less crowded. The Inca trails have become very famous which means there are daily large tour groups with anywhere from 5-20 people. You can often get stuck behind groups and may not get to experience any privacy or remoteness.
- The Inca trails are mostly through lush forest vegetation and do not go to very high elevations. Although it is beautiful, you never get to experience any altitude for viewpoints.
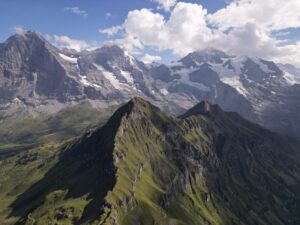
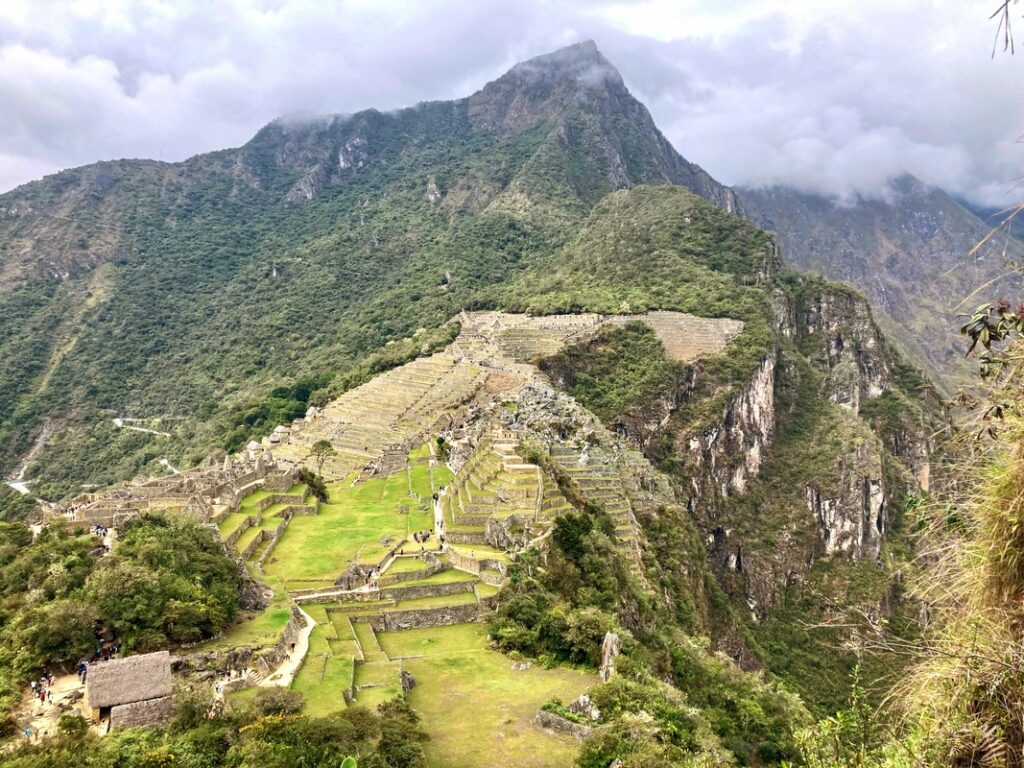
- Not only does the Salkantay go to higher altitudes (including crossing a mountain pass at 15,193 ft) but you even get to see Machu Picchu from above as you approach! The Salkantay trek mountain peak views (especially on Day 2) are unreal.
- You can do the Salkantay trek without a guide! Check out our guide below for everything you need to know to do the Salkantay Trek without a guide.
HIKE GENERAL INFORMATION
DISTANCE: 42.9 MILES
TOTAL ELEVATION GAIN: 11,663 FT
DURATION: 5 DAYS/4 NIGHTS
DIFFICULTY: HARD
ACCOMMODATIONS
You can definitely book accommodations as you go along the Salkantay Trek. There is no need to make reservations in advance (which is also quadruple the price). Just show up to a place you are interested in and ask how much. Many places offered dinner and breakfast included with the room price. Most accommodations cost us around 120 – 160 Sol/night (~$30 – 40).
While there are not a ton of options, as long as you are flexible with where you stay, there are enough options in the towns on our route to find accommodation the day of. That being said, it is always safest to arrive before dark to give yourself some wiggle room.
For the most part, these are not luxury accommodations. They tend to range from pure campsites to dorms to glamping domes to more standard hotels or lodges. We were able to easily get a private room everywhere we stayed. If you do the Salkantay trek with a tour group, your accommodations will likely be booked in advance. Campsites seemed available in each city.
- Soraypampa had a few lodge and dome options, but some were booked up by tour groups.
- Chaullay has plenty of options but they are much more hostel-like.
- Lacmabamba actually has some nice lodges and more lux hotels.
- Aguas Calientes is a much larger city with a huge range of hotels and other options.
FOOD
There is food available along the trek so no need to bring a bunch of meals with you. We traveled with water, some light snacks, and one emergency meal each just in case we needed it (we didn’t). Again, while not a ton of options, as long as you are flexible you will definitely be able to secure food along the trail, which means way lighter packs. Some of the common meals we had were omelets, bolognese, fish, and fruits.
As mentioned above, most lodges will offer to include breakfast and dinner with the room price. We didn’t see a lot of stand-alone restaurants in Soraypampa, but Chaullay, Lacmabamba, and Aguas Calientes had way more.
WHAT TO PACK
One of the best parts of the Salkantay trek is that because you have the option to stay in accommodations and grab food as you hike, you can pack WAY lighter than most multiday backpacking trips. This was our first time trying to go ultra-light. It felt AMAZING. Since this hike has a lot of mileage and elevation gain/drop each day, the lighter you can pack the more your future self will thank you. Here’s what we took:
- Backpack: We tried out our brand new Matafor Freerain 28 pack for this trip, as well as our older Freerain 22. These packs are ultra light-weight, waterproof, compresses to the size of a papaya, and the 28 even comes with a legit hip strap for weight redistribution. Love.
- 1 hot weather outfit: Sun shirt or sun hoodie + hiking pants with less warm socks.
- 1 cold weather outfit: A thermal top + pants with warmer socks. This is also what we usually slept in.
- Hiking boots.
- Sun protection: Sunglasses, hat, sunscreen.
- A puffer, light gloves, and a buff/scarf for higher elevations.
- Rain Jacket.
- Underwear.
- Bathroom essentials only.
- Water filtration system: We always bring our favorite Katadyn BeFree (which weighs nothing) along with a refillable water bottle. No more continuous purchasing of plastic water bottles!
- Sleeping bag liner: If you are not camping, you do not need to bring a sleeping bag. Most places will give you enough blankets to keep warm, but sometimes it is nice to have an extra layer of sanitary protection. These Cocoon Liners are made of silk so they weigh NOTHING and feel great on the skin.
- Map and GPS system: We use AllTrails Pro and carry a Garmin inReach Mini on all of our hikes now.
- Charging cables and a portable charger: Peru uses 220V Type A and C sockets. Not every accommodation has charging capabilities.
- Headlamp: Just in case.
- An Emergency Kit: Always.
- Trekking poles: These will protect your joints on this rocky terrain.
- Cash: Bring enough for a few days as you may not have access to an ATM until reaching Aguas Calientes.
DIFFICULTY/SAFETY
The Salkantay is definitely a challenging trek, both due to daily mileage as well as elevation gain/drops each day. Expect to hike on average 10 miles and climb 1000 – 3000 ft elevation almost daily. The terrain can be rocky but is not super technically challenging.
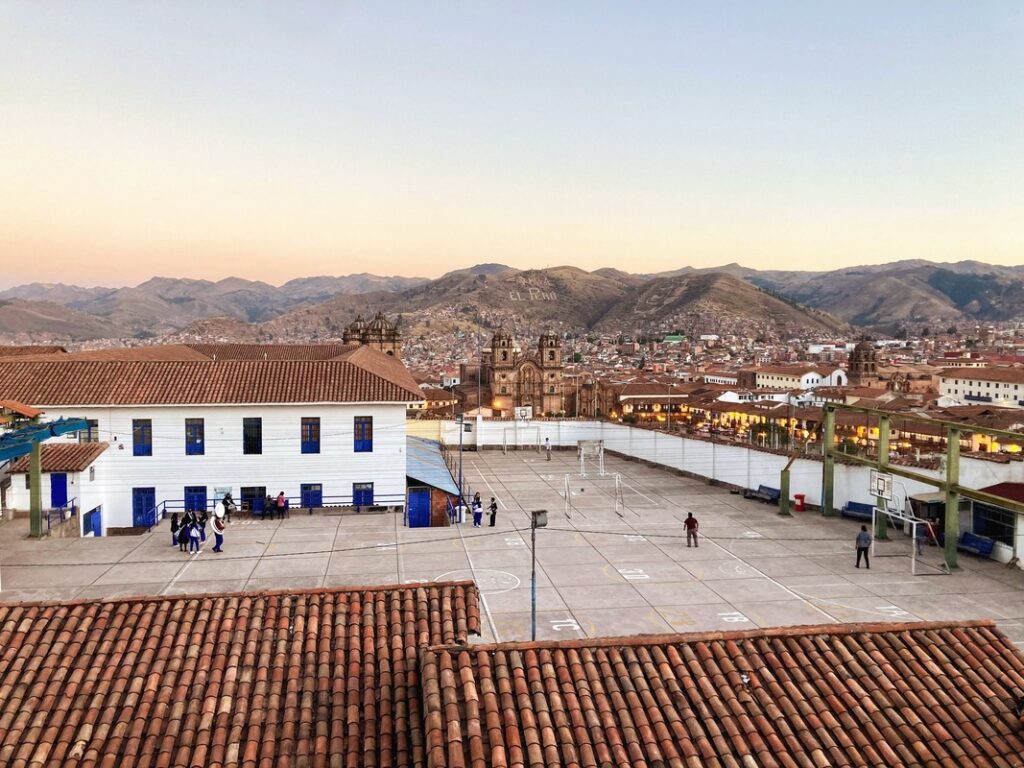
You will also be crossing a mountain pass at 15,193ft, so make sure you give yourself at least 1-2 days to acclimate (like in Cusco) in order to prevent altitude sickness. If you hire a taxi and start the hike in Soraypampa, consider spending an extra night there if you have not acclimated. You can also talk to your doctor about a short course of acetazolamide. Read more about altitude sickness on our Hiking Acatenango post (written by doctors!).
We were definitely pretty tired by the time we reached Aguas Calientes. Be honest with yourself. If this seems outside of your limits, consider the Inca Trail which is a little easier.
GETTING THERE
To start your trek from Cusco, you will first need to grab a bus to Mollepata. Go to the intersection of Av. Arcopata and Av Apurimac between 4 am – 4:30 am and ask for Mollepata. You may be asked “collectivo?” which refers to shared (as opposed to private) transportation. It’s more of a large van rather than a bus. Tickets cost us 20 SOL per person.
The bus/van takes about 2 hours to reach Mollepata. Here you will first stop by the boleteria to buy an entrance ticket to the area. There are also public bathrooms in the building. Fill out the form with the information for all members of your party and pay another 20 SOL/person for your tickets and registration.
Outside the boleteria will be some taxis that can take you to Challacancha where you can start the trail. Our taxi cost 70 SOL. En route, there is a police checkpoint where they will need to check your tickets and registration from the boleteria. It took about 1 hour to get there and we officially started the trek at 7:30 AM.
THE SALKANTAY TREK
DAY 1: CHALLACANCHA TO SORAYPAMPA
~4 MILES
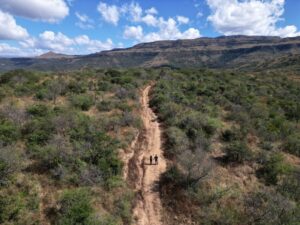
The trail starts on the left-hand side, off the main road. Make sure to keep a GPS system such as AllTrails Pro to ensure you are staying on the path as there are some unmarked forks. The beginning of the trek begins with a mile of switchbacks uphill but then settles to a mostly flat walk to Soraypampa. We passed by tons of different berries, hummingbirds, butterflies, guinea pigs, and even condors!
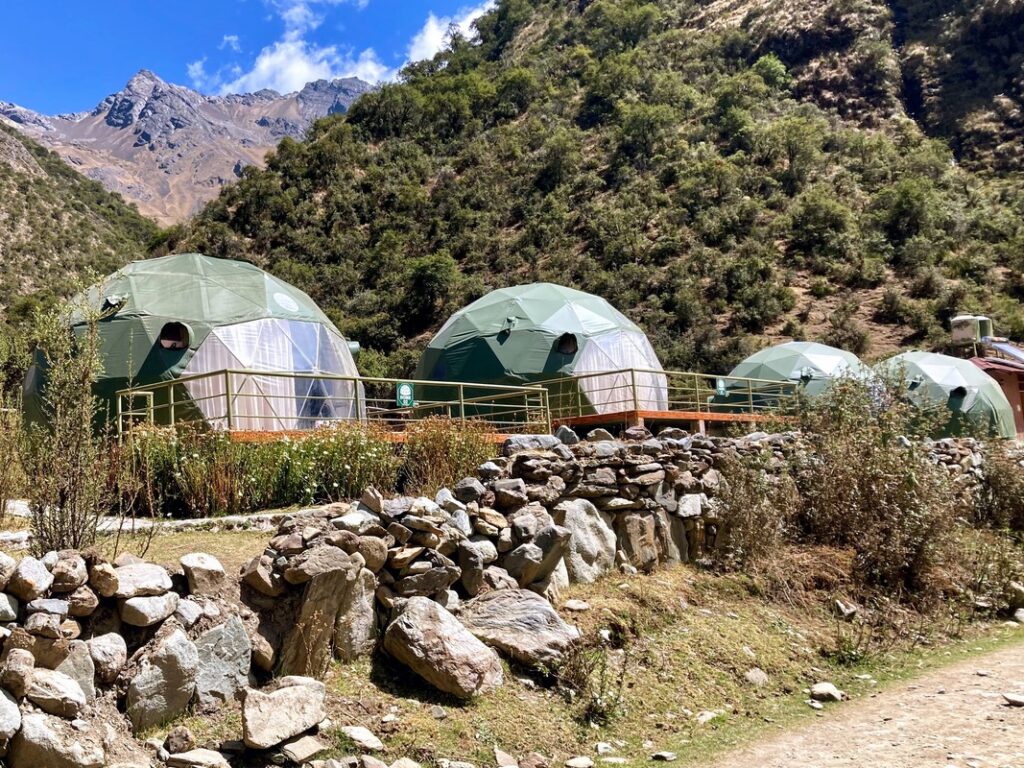
You will hit Soraypampa at mile 4. We found accommodation at Salkantay Sky Lodge Domes. We paid 160 SOL for a private dome which includes a private toilet and shower (unfortunately ours was not hot), dinner and breakfast. WiFi cost 10 SOL extra. Each dome has a SPECTACULAR view of Humantay mountain.
The owner also runs a restaurant and market. We had a delicious bolognese for dinner and omelets for breakfast. 5 stars, we would absolutely stay here again. After walking around we agreed this is the best accommodation in the area. It is a short walk to the start of the Humantay Lake Trek.
There are several lodging options in Soraypampa but not many restaurants. Salkantay Sky Lodge Domes is attached to Abra Humantay Restobar which is one of the few. It will be one of the first places you encounter in Soraypampa, next to a line of green glamping domes. Be aware that some accommodation places only seem to cater to large tour groups.
If you are short on time, taxis can drop you off all the way to Soraypampa instead of Challacancha. In retrospect, this is what we would do next time. You get nice views of Humantay mountain from Challacancha, but it’s mostly the same landscape and the views only get better and better from Soraypampa and onwards.
SIDE TREK: SORAYPAMPA TO LAGUNA HUMANTAY TURQUESA
~2.5 MILES roundtrip
~1500 FT ELEVATION GAIN
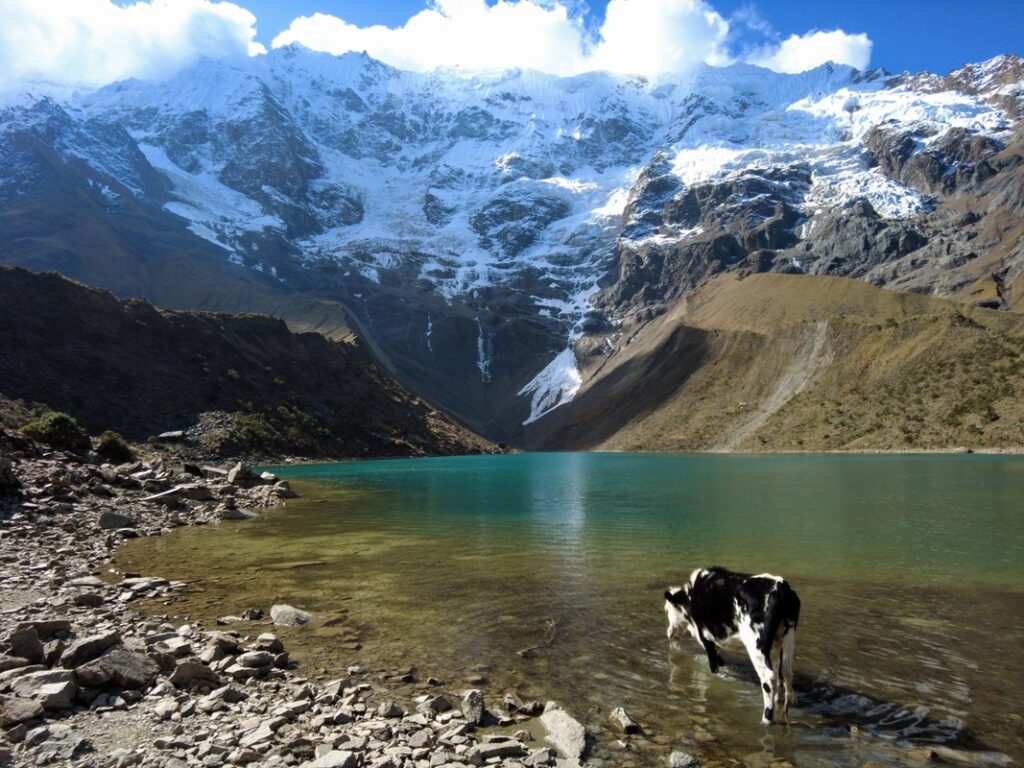
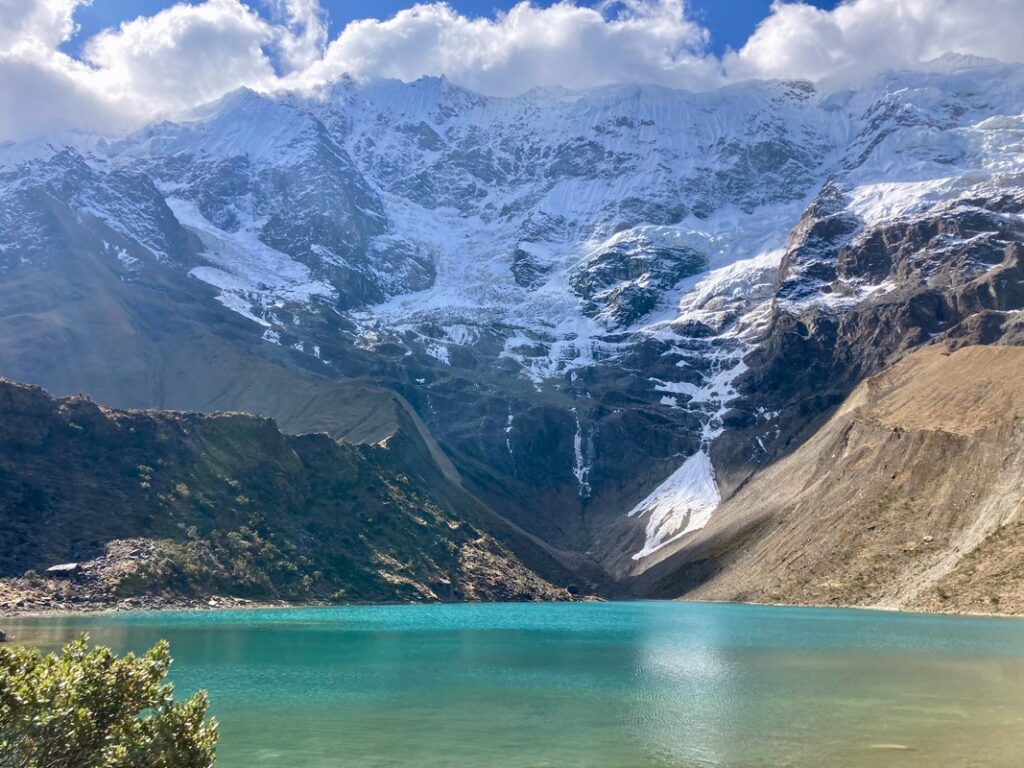
This is a HIGHLY recommended side trek. Although you gain 1500 ft in about one hour, the color of this glacial lake with its epic Humantay mountain backdrop is incredible. The best time to go would be late morning to midday when the sun is directly above the lake which brings out the most color in the turquoise lake. To avoid all the tour crowds, later afternoon is better.
Once you are there, follow the lake to the left for a short five-minute climb to get views from above. We never knew cows could climb mountains… but now we know. Beautiful hike and a great way to get acclimated. Definitely recommend.
DAY 2: SORAYPAMPA TO CHAULLAY/COLCAPAMPA
~13 MILES
~2400 FT ELEVATION GAIN, ~6000 FT ELEVATION DROP
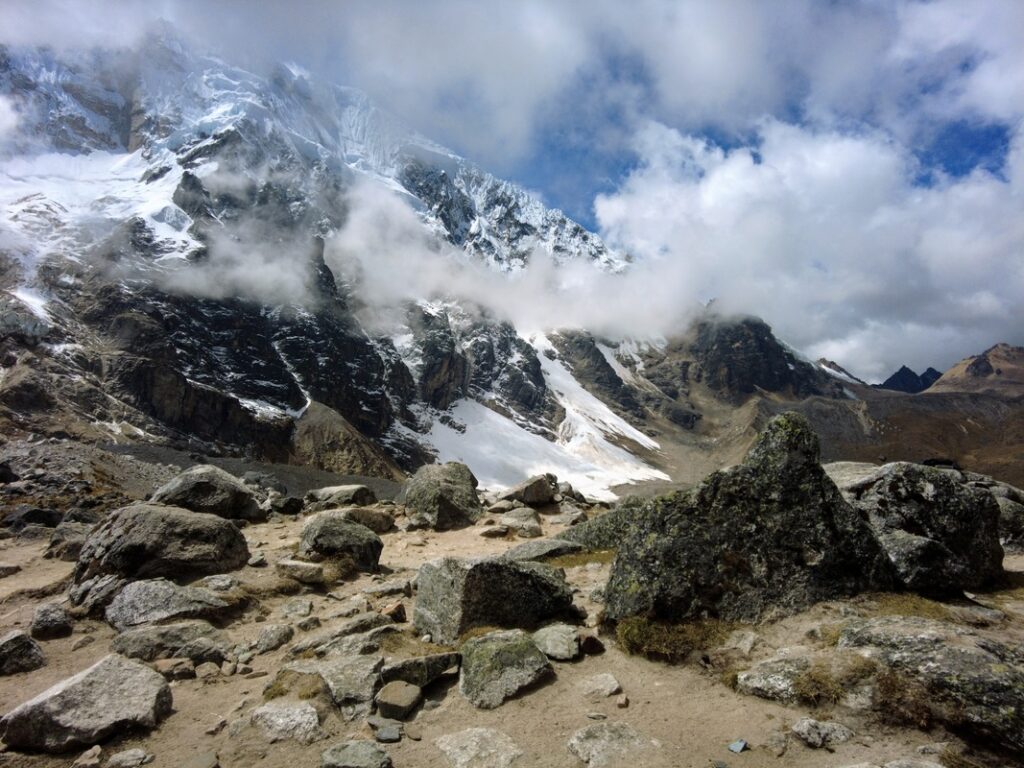
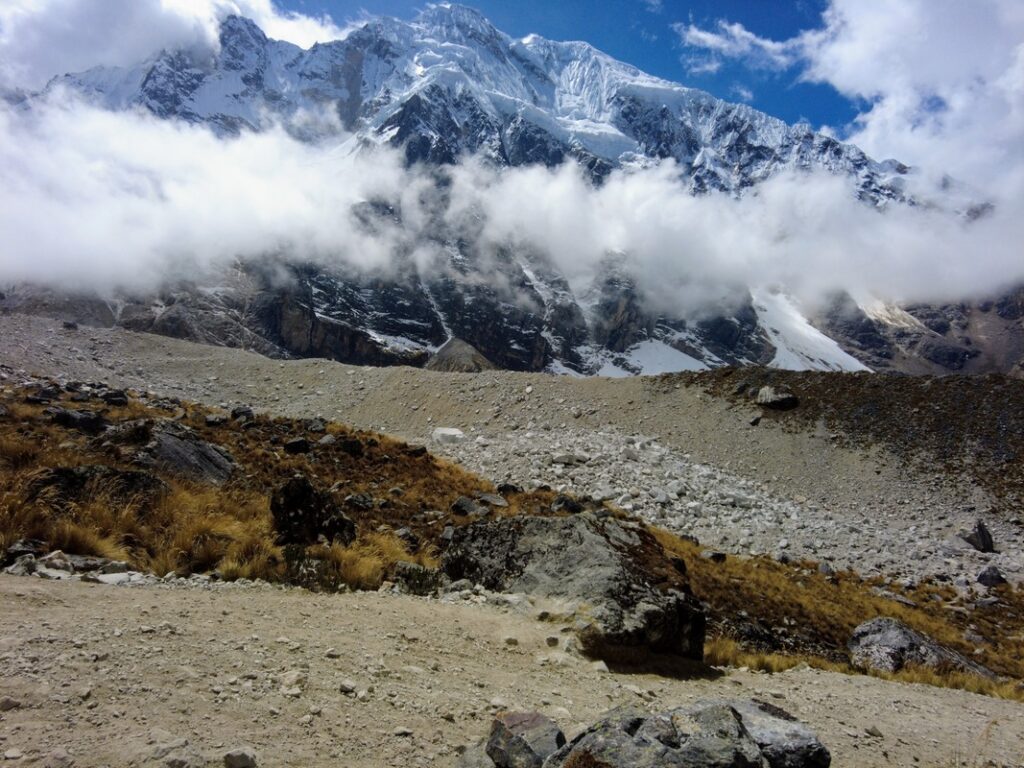
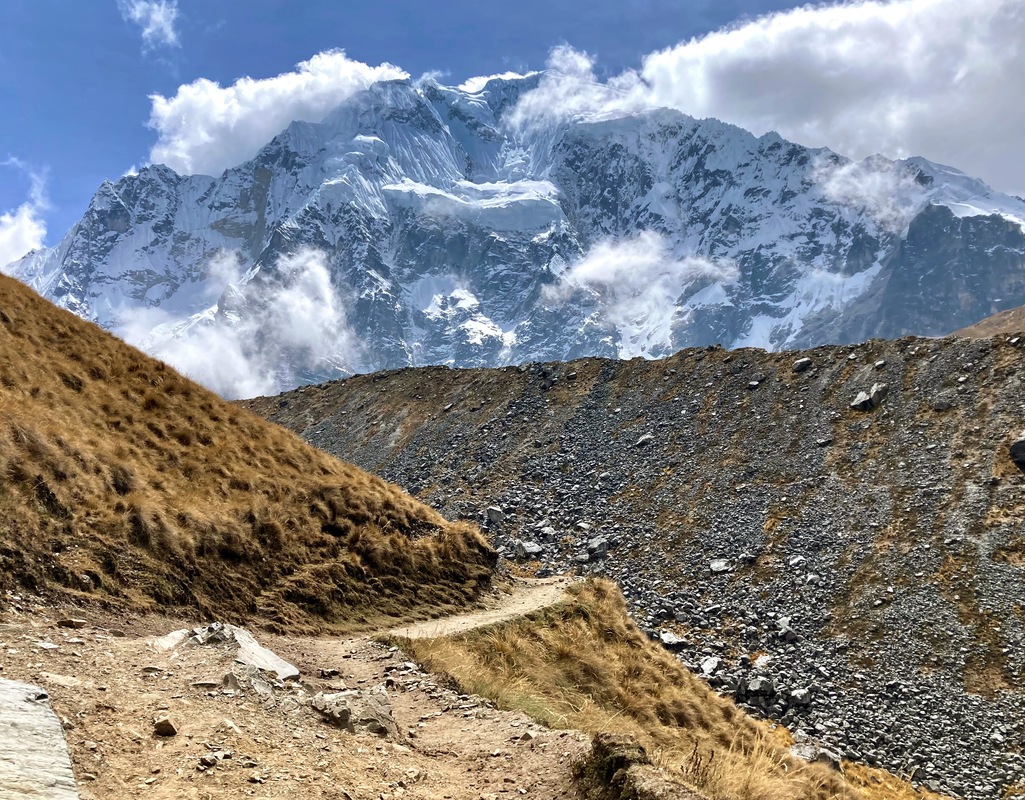
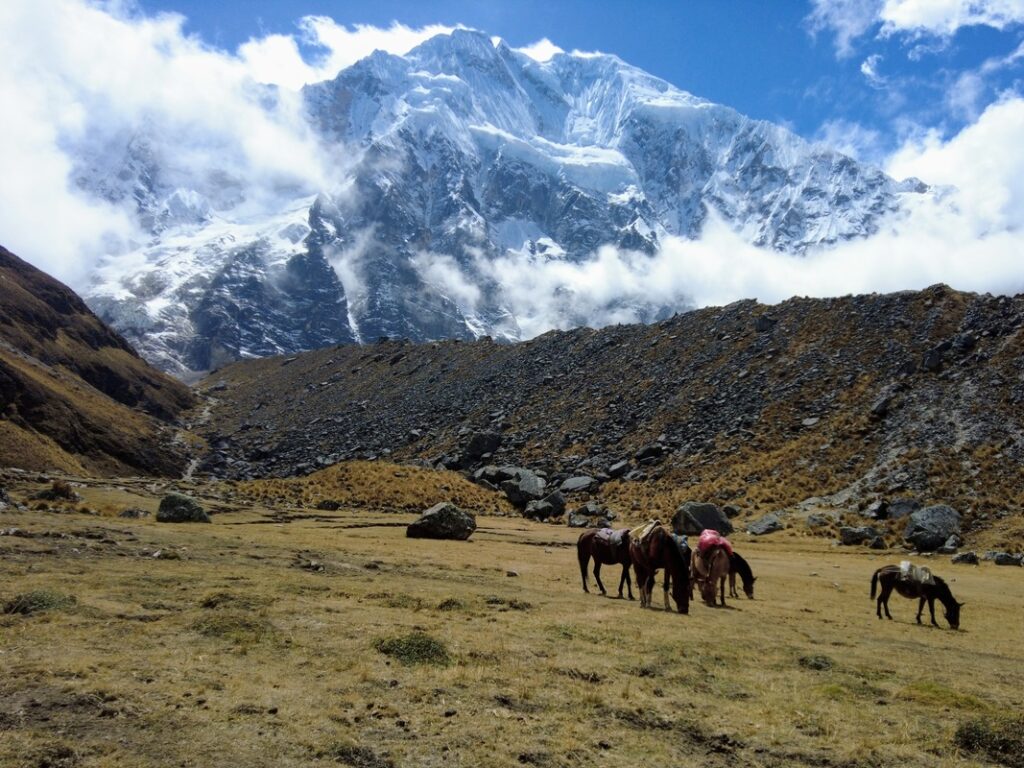
Today will be one of the hardest days of the trek but also the most rewarding. Shortly after leaving Soraypampa, you will be blessed with breathtaking open valley views of Humantay Mountain. As you make the 2,400ft ascent to the mountain pass, you get closer and closer to the snowy peaks.
Prepare for windy conditions at the mountain pass which is located at 15,193ft. Views of the peak from the mountain pass are crazy cool. It feels like it is within arm’s reach.
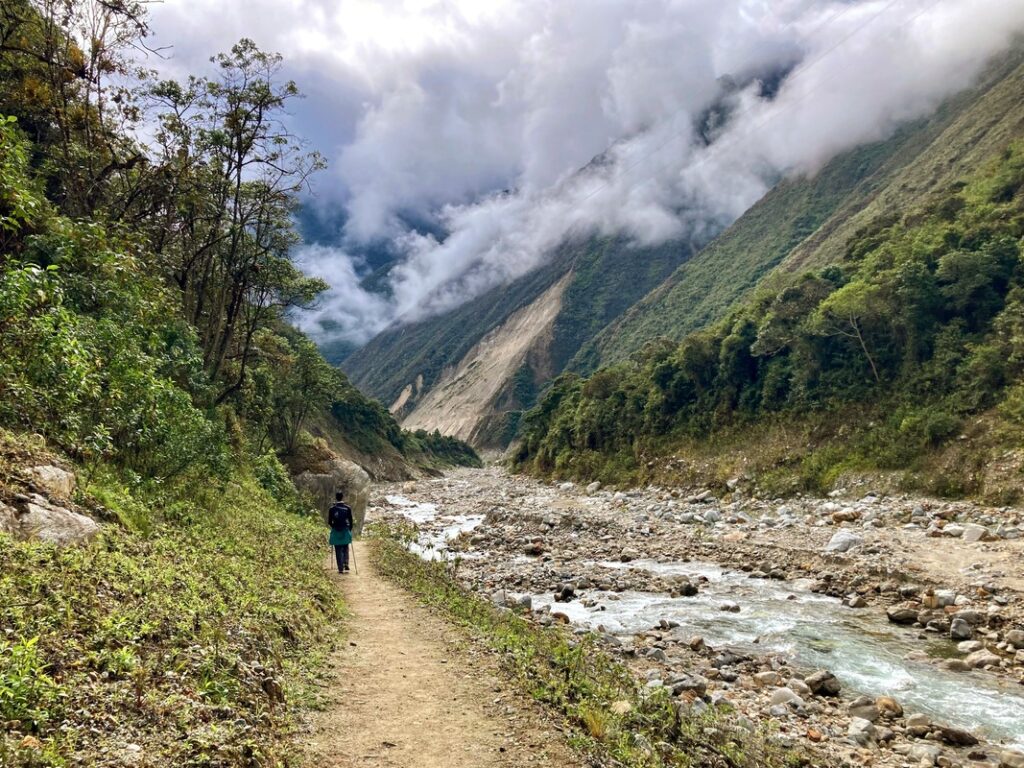
The way down is rocky, steep, long, and annoying. We highly recommend trekking poles for safety. Nobody likes sprained ankles in the middle of a remote hike.
You will eventually (finally) reach the town of Chaullay which has some hostels, campgrounds, and basic accommodations. We continued onto the next town 1km away, Colcapampa, which is like a more run-down version of Chaullay… Cold showers in a chicken coup kind of run-down. Stay in Chaullay if you can and grab a meal at one of the restro-bars. Don’t expect luxury.
DAY 3: CHAULLAY/COLCAPAMPA TO LACMABAMBA
~11 MILES
~2600 FT ELEVATION DROP
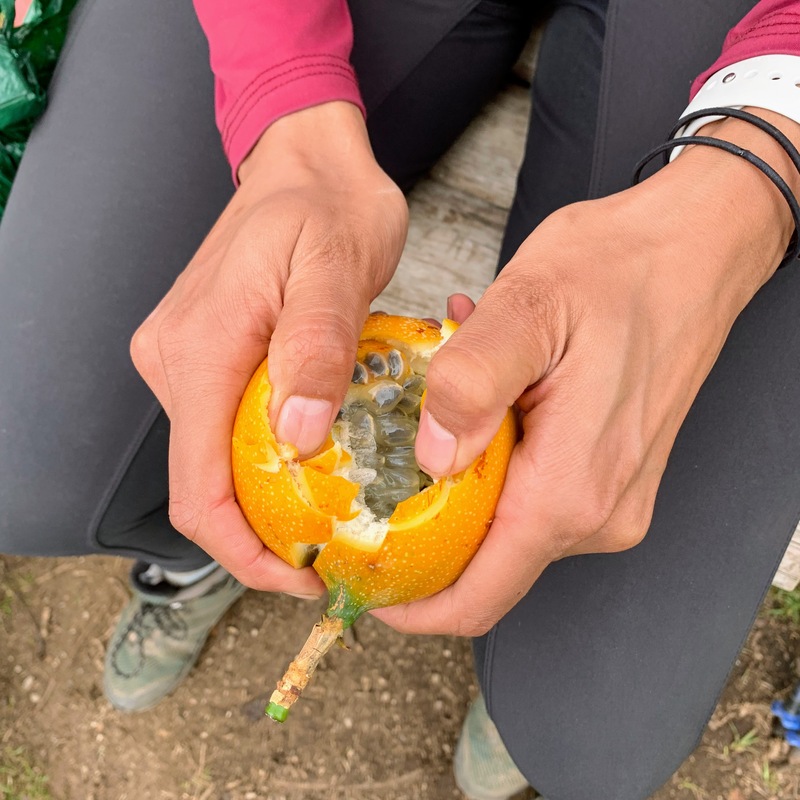
Today will be the easiest day of your trek. Mostly downhill but on softer, less rocky terrain. You are now entering coffee and fruit plantation land. You will run into plenty of little cafes along this route with fresh granadillas, avocados, mangos, guavas, bananas, and more. There are also plenty of nicer lodges and campgrounds en route. If we had more time, we would have spent an extra day in this region.
Upon approaching Lacmabamba, one of the very first accommodations you will encounter is the Viamonte Eco Lodge, which we absolutely loved. The family that runs this place also owns Cafe Viamonte, which makes some of the tastiest organic coffee we have tried in the world.
To get to Cafe Viamonte, ditch your pack at the Ecolodge and hike up the 10 staircases through coffee and avocado plantations. If you stay at the Ecolodge, you will also get to try a cuppa for breakfast. Mmmm mmmmm….
Viamonte Eco Lodge is what you dream of at the end of a long hike: hot showers, good food, beautiful rooms, fast wifi, and a courtyard garden to lounge in. The family is super sweet and accommodating and they even take credit card. Would stay here again and again.
Further past the staircases and cafe Viamonte is Lucma Lodge which looked very lux and western but was already fully booked by 2 pm. Sonya y Walter’s Lodge also has good reviews and food. Plenty of campgrounds and in-between accommodations in this area. A great place for coffee tours. A gem of an area.
DAY 4: LACMABAMBA TO AGUAS CALIENTES
~15 MILES
~ 3,000 FT TOTAL ELEVATION GAIN/DROP
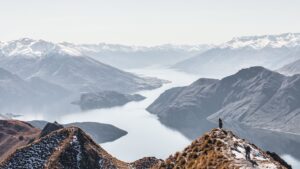
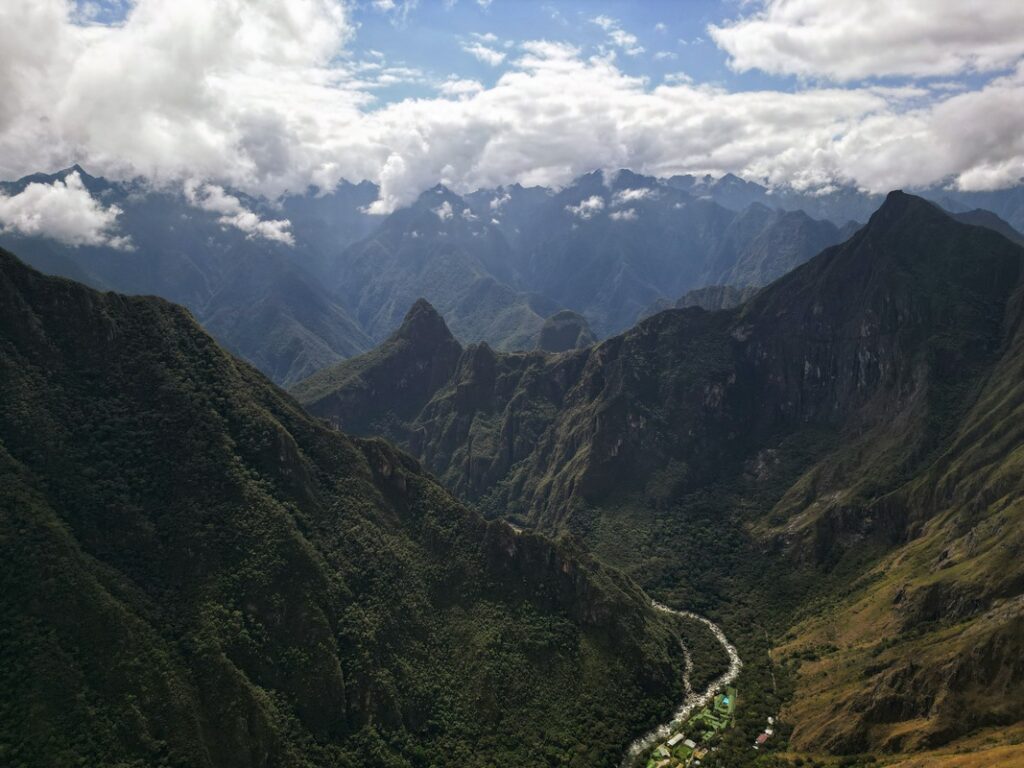
This will be another hard day of hiking. You will start the day with almost 3,000 ft of elevation gain, but it did not feel as hard as Day 2 probably because the terrain is less rocky and softer. At the peak, you will see a sign towards the left for a viewpoint. This 5-minute walk will give you your first glimpse of Machu Picchu! There is also a campsite and refreshments stand up here. Treat yourself!
Afterward begins the steep decline down. You will pass a second viewpoint on the way which has even better views of Machu Picchu, a restaurant, and a large grassy lawn to lay out on.
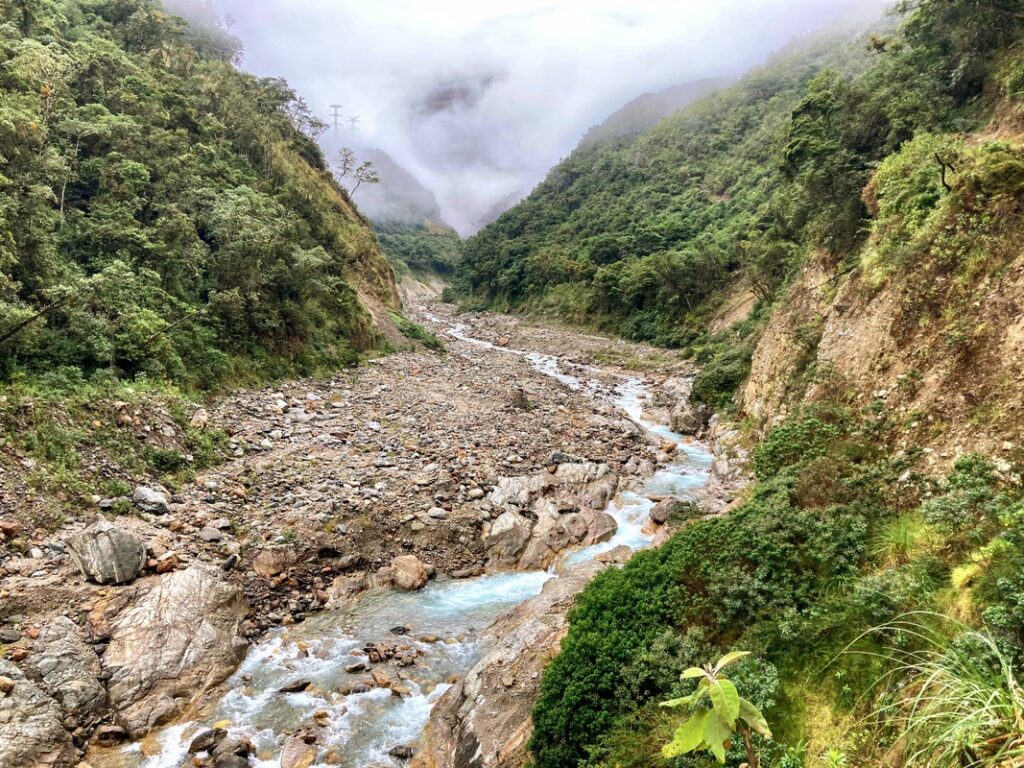
The decline ends when you reach the river Urubamba. From here it is a mostly flat walk into the town of Hidroelectrica. You will be asked to show your passports and Machu Picchu ticket to enter the area.
If you have time for a detour, grab a taxi or bus to Santa Teresa and soak in the Aguas Termales Cocalmayo de Santa Teresa waters (which are way nicer than the community thermal pools at Aguas Calientes).
The only way to get from Hidroelectrica to Aguas Calientes is either by train or a 6-mile walk along the train tracks. There is only ONE afternoon train that leaves at 1630, but all seats were already sold out by the time we arrived around 1430. It’s about a 2 – 2.5 hour walk to Aguas Calientes which is flat the whole way but a little annoying as you’re walking on rocks for most of it and pretty pooped at this point.
Aguas Calientes is a cute town with a lot of shops, cafes, and restaurants. There is a wide variety of accommodations in the area. Sumaq Machu Picchu Hotel and Tierra Viva both looked super nice and were two of the first places as you enter town. We stayed deeper in the city at Susanna Inn, which was nothing special but affordable with hot showers and a nice breakfast. The walls were a little thin though.
Tons of dining options with Chullos Craft Beer & Homemade Food being a popular option. Celebrate with a pisco sour and try their eggplant appetizer.
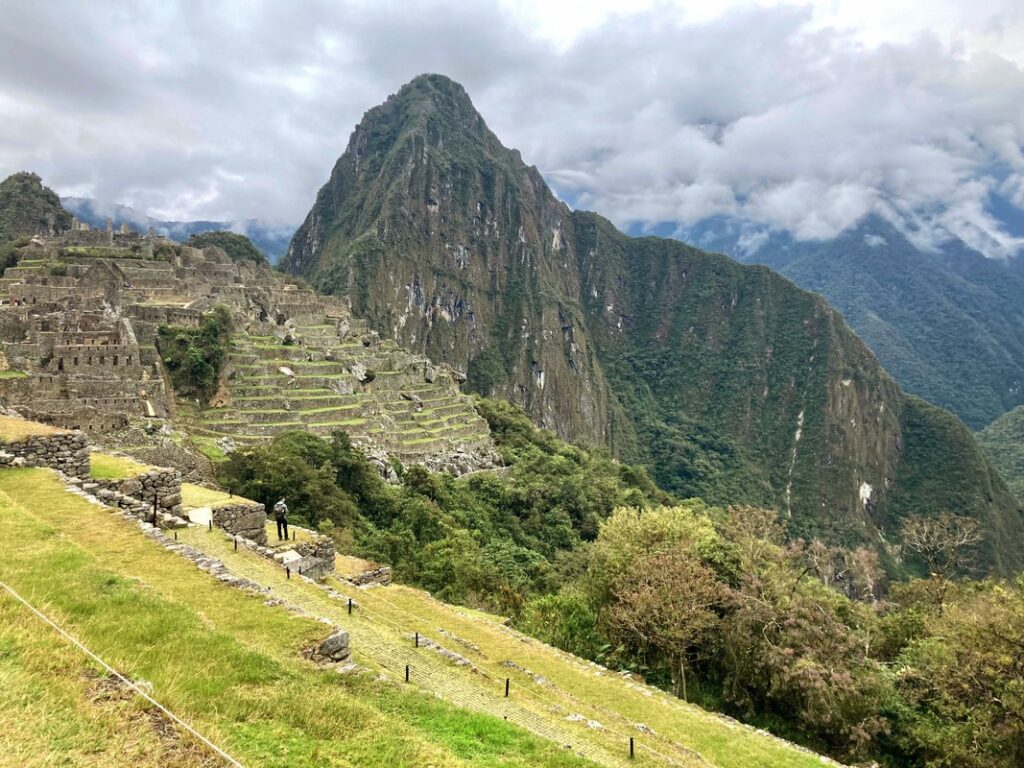
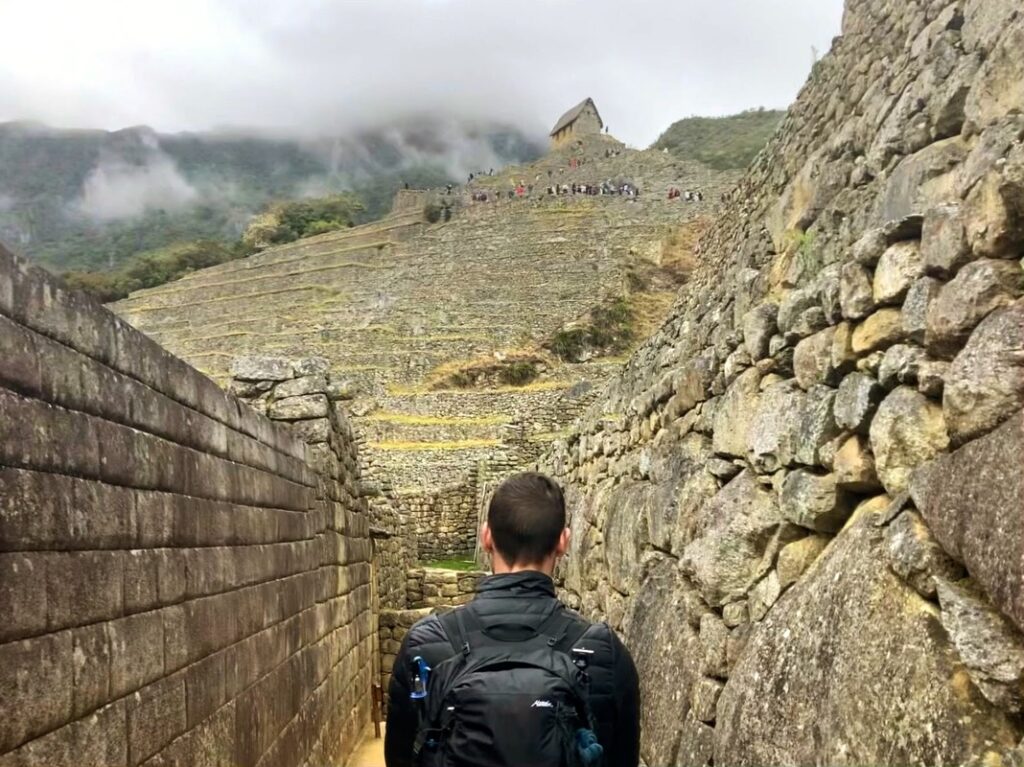
DAY 5: AGUAS CALIENTES TO MACHU PICCHU
~4 MILES
~2000 FT ELEVATION GAIN
HOW TO GET TO MACHU PICCHU
You have the option of hiking up to Machu Picchu or taking a bus. We took the bus for 90 SOL roundtrip because our legs were dead, and honestly, it didn’t really look like an exciting hike; mostly switchbacks up a mountain with the same view throughout.
You can purchase a bus ticket on the morning of your trek at an office about a block away from the bus station. The bus ride is about 20 minutes. Make sure to buy a ticket at least an hour before your scheduled time to guarantee your entry.
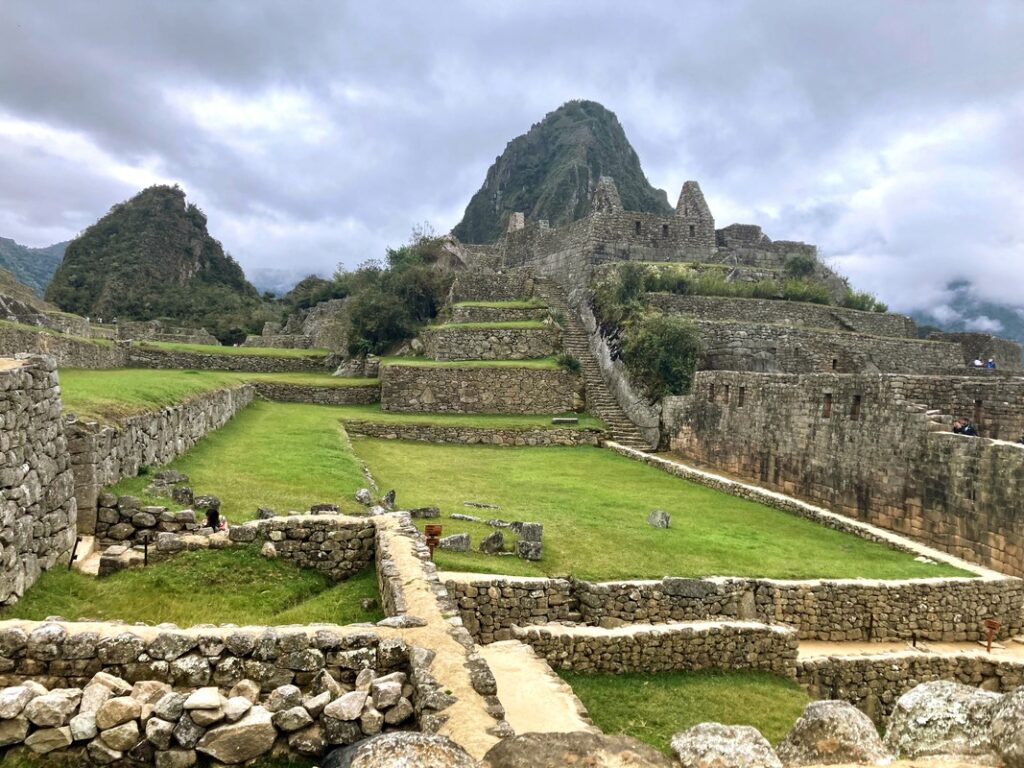
Machu Picchu has changed over the past few years and it has definitely become more complicated to visit. We highly recommend purchasing your ticket as soon as you know a potential travel date because the good ones can sell out fast. You are no longer able to explore the site freely, you can only visit 1 of 4 designated areas with your ticket.
THE DIFFERENT ROUTES
Routes 1 and 2 allow you to visit the upper Sun temple complex and are the most desirable (and therefore sell out the fastest). Routes 3 and 4 will only allow you to visit the lower sector and agricultural terraces. Routes 1 and 3 are shorter, while 2 and 4 are longer. You can learn more about the details of each route in this post by SETOURS.
Your ticket will also be booked for a certain time window. For example, ours was the 8:00 AM time slot. You have exactly 1 hour to enter the Machu Picchu complex from the start time of your ticket (eg: 8 – 9:00 AM) or you will be denied entry.
Once in the Machu Picchu complex, you will have approximately 4 hours to complete your area. You are only allowed to go in one direction and cannot repeat the loop. Therefore, if you were thinking of hiring a guide, it’s best to find one before entering. There are plenty of guides in vests looking to establish private or group tours in a variety of languages. Our private guide cost $60/person (he was not able to find enough English speakers with Route 4 tickets to do a group tour which would have been only $15-20/person).
Do not allow your guide to hurry you through the circuit. Take your time and enjoy the area, as you will not be able to turn around and go back to see something. Many of the guides have Incan heritage and are extremely knowledgeable about the site and it’s history, it definitely enriches your experience and we would recommend it.
ADDITIONAL PEAKS
You also have the option of visiting one of three additional peaks when you purchase your ticket. This will add one hour to your allotted time.
- Huayna Picchu is a peak looking across from the Machu Picchu complex and will give you views from an elevation facing the site. We think this peak would have the best views. It takes about 45-60 minutes to ascend this peak.
- Machu Picchu Mountain will give you views from directly above the complex. Probably awesome as well. This is a 90-minute hike over a lot of stairs, so make sure you wear proper shoes and are in decent physical shape.
- Lastly there is the new Huchu’y Picchu, which is a short hike to a smaller peak giving you views of Machu Picchu from the side. This was the only option available at the time of our booking one month prior to our trek. It was a 15-minute 700ft elevation climb and the views are definitely worth it, but Huayna Picchu or Machu Picchu Mountain would probably be more epic if you can score a ticket.
RULES AND HOW TO PURCHASE A TICKET
As you exit the complex, feel free to take your time as no one really seems to be forcing you out of the lower segment. If you purchased a round-trip bus ticket, you can just get in the bus line to return to Aguas Calientes whenever you are done. There is also a restaurant, one super lux hotel, and a gift shop on site. No selfie sticks or drones allowed. Hiking poles for those with a disability only so as to not damage the site. Lots of new rules as you can see.
At the time of our visit (Summer 2022), face masks were required on the bus and train to Machu Picchu, but we’re optional on-site. Make sure to bring your passports. We had read that vaccination was required to enter, but no one checked our COVID-19 vaccination cards at any point.
You can book your Machu Picchu ticket at their official website here. You can only purchase a ticket on their website or at the ticket office in Cusco or Aguas Calientes. There are NO ticket sales at Machu Picchu itself. To learn more about the new rules and regulations during your visit check out this post by SETours.
RETURNING TO CUSCO
To return to Cusco from Aguas Calientes is also a little complicated as there are no taxis or buses that actually go to Aguas Calientes. Only the train. The simplest option is to book the train back to Cusco, but it is also the most expensive. It cost us around ~$100/person to book the Vistadome Peru Rail train back to San Pedro Cusco, and it takes about 4 hours. There is also the Inca Rail which may have cheaper prices.
You should book your train ticket ahead of time if you are trying to get back to Cusco by a certain time as there are not a ton of options. There are also some train-bus combinations available. You can also hike the 6 miles back to Hidroelectrica to find a cheaper bus route as this city, unlike Aguas Calientes, is connected to the main roads.
SUMMARY
Overall, although accessing Machu Picchu has become more complicated over the years, choosing to make the journey via the Salkantay Trek was the best decision. Although harder than the Inca Trails, the Salkantay Trek rewards you with high elevations, amazing snowy peaks, and views of Machu Picchu from afar that you don’t get to experience otherwise.
The little towns along the way make it easy to trek with a lighter pack as you don’t need to worry about food or lodging. And it’s an amazing route for camping as well. You definitely do NOT need a guide to experience this adventure, doing it at your own pace and soaking it all in makes it all the more magical. Immerse yourself in this Incan world with a journey you will never forget! Highly recommend.

MAP
Here is a link to our Google Map to access all the areas discussed above. We actually had a challenging time finding a lot of these locations during our planning process, so we hope this helps you out on your journey!